Want to Save this Recipe?
Enter your email below & we'll send it straight to your inbox. Plus you'll get great new recipes from us every week!
I know I am not alone on my constant mission to find healthy, well-balanced dinners that all four of us can enjoy together (I am not a fan of making separate meals). And the best part about this dish is that once you do the hard part, which is detailed below, you can freeze the uncooked raviolis. Think of those nights when you have no plan for dinner or better yet when you are going out and need something quick for the babysitter to feed the kids. What do a lot of moms do? Throw some frozen chicken nuggets in the microwave for a few minutes. Now if you had some raviolis in your freezer, you could put forth almost the exact same effort by throwing a few in some boiling water for only 4 minutes (sans the sauce). Yes, that is all it takes for fresh pasta to cook…even when they start out frozen!
So, I highly recommend spending one Sunday afternoon making a big batch of these tasty treats. It will take some time and oh it will make a mess, but I promise it is definitely worth it. Plus, if you have kids I am sure they would LOVE to help you roll out the dough. You don’t even have to tell them that the yummy, sweet butternut squash inside the ravioli is actually a vegetable!

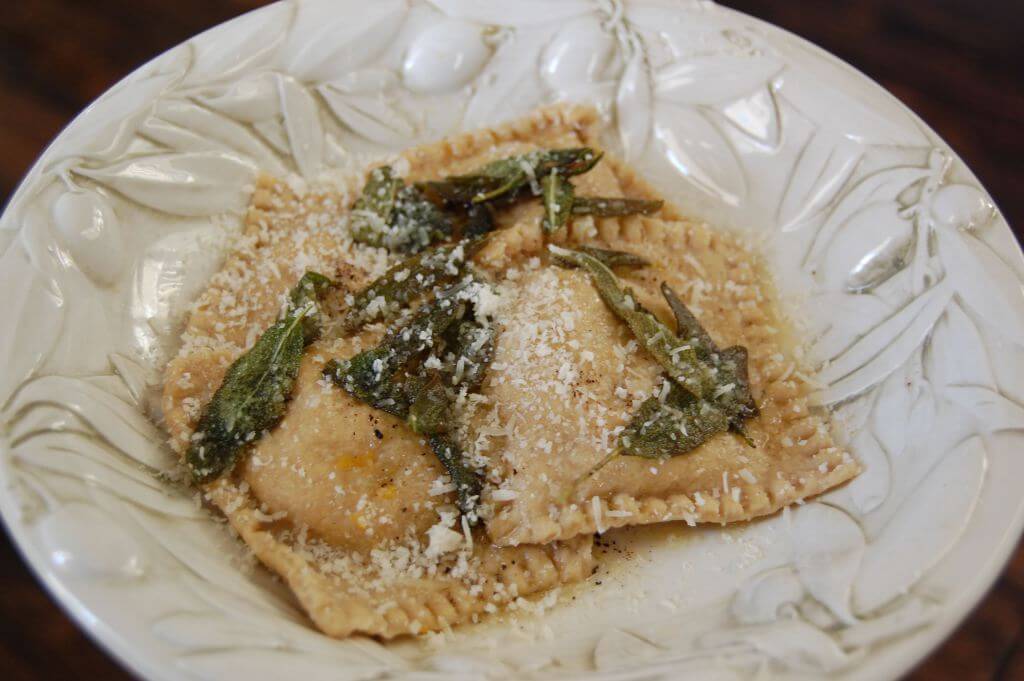
Butternut Squash Ravioli
Ingredients
Pasta Dough
- 6 eggs
- 3 cups whole-wheat flour ((I use King Arthur’s Organic White Whole-Wheat Flour))
Filling
- 2 ½ lbs butternut squash
- 1 tablespoon butter (melted)
- 1 tablespoon pure maple syrup
- 1 large orange (zested)
- ½ cup mascarpone cheese ((if you can’t find mascarpone use cream cheese as an alternative))
- ⅓ cup parmesan cheese
- ¼ teaspoon cinnamon (ground)
- 1 pinch nutmeg
- salt (to taste)
- pepper (to taste)
Sauce
- 5 tablespoons butter
- 2 handfuls sage (leaves torn)
Instructions
Pasta Dough
- Blend the eggs and flour together in a food processor (with dough blade), Kitchenaid mixer (with dough hook), or by hand with a fork.
- If using a processor or mixer, the dough will be one large ball chasing itself around the bowl when it is done.

- If the ball of dough is even slightly sticky when you take it out then pat it with flour. Wrap it in plastic wrap and let it rest for at least 20 – 30 minutes on the counter.
- Either roll it out by hand or use a pasta machine to thin out the dough and make sheets of pasta (follow manufacturers instructions).
Some Pasta Making Tips:
When you are working with your dough it should not be sticky at all so pat it with flour as needed.
My pasta machine has 6 settings – setting 1 makes the dough the thickest and 6 makes it the thinnest. I start on 1, fold the dough over a few times and keep running it through on setting 1 until it is a nice flat piece. Then you progress through 2, 3, 4, etc. to the desired thickness. I find that when making ravioli it is best to stop at 4 otherwise it will get too thin and break apart easily once the moisture of the filling touches it.


Filling
- Preheat oven to 400 degrees F. Slice the squash lengthwise and remove the seeds. Put the cut side down on a greased baking sheet (or sheet covered with parchment paper).
- Roast the squash in the oven until tender when pierced with a fork. For smaller squash it could take 30 – 40 minutes. For larger squash it could take up to an hour. (This is a good time to mix your dough so it has time to rest – see details above)
- When squash is done scoop the pulp out into a large mixing bowl and discard the skin. Add all ingredients from the butter down to the salt and pepper and stir together thoroughly.
- This filling can be made a day in advance or used to make raviolis immediately.
- When you are ready to make the raviolis, follow the instructions above for making your dough. Lay the finished dough out in sheets and by the spoonful add the ravioli filling. You can brush the dough in-between the filling with either warm water or some egg wash (egg with a touch of water) to help the two pieces stick together. I use an inexpensive Williams Sonoma ravioli tool to seal it together.
- Freeze (do not refrigerate) leftovers on sheets of wax paper in a Tupperware container. Raviolis should not be touching and there is never a need to defrost…just throw the frozen ones right in the boiling water for about 4 minutes.
If you are boiling them fresh just after making them then it only takes about 3 minutes.


Sauce
- Cook the butter over med-high heat in a sautee pan.
- Add the sage leaves to the butter.
- Cook until butter begins to turn brown then remove from heat immediately.
- Pour over cooked ravioli.


Jennifer says
They were absolutely delicious!!! I used my own dough recipe but the filling and sauce were fantastic.
Can you freeze the extra filling?
Amy Taylor (comment moderator) says
Yes, you can freeze it.
D Hendrix says
I just found your site and look forward to trying some of your wonderful recipes. This is also the first time I used my KitchenAid ravioli maker, and I'm hoping that my mistakes and first-time experience will help others.
The first mistake I made was to roll the pasta less than the width of the rollers causing the ravioli to have open ends. That is easily corrected by pressing the dough together and rolling it the full width the next time. The second mistake I made was to roll the dough too thick. I used the recommended setting of 3. Next time I'll try 4 or 5.
Here's what I think I did right. After roasting the squash, I pureed it in my food processor, and then cooked the squash, butter, zest and cinnamon in a 3 quart sauce pan until most of the liquid was boiled off making a much less moist filling, and concentrating the flavor. After removing squash mixture from the heat, I added the remaining ingredients to the saucepan and stirred them together. I also "simmered" the pasta to cook it. It's the same temperature as boiling, but is much gentler on the pasta. The ravioli was amazing!!! Thanks for this tasty, and fun, recipe.
Karen says
I absolutely love this filling! The recipe for the dough is awful though. My dough came out way too sticky and was difficult to work with. I had to find other recipes to pinpoint what had gone wrong. Most pasta recipes seem to stick to one egg for one cup of flour, so there was way too much liquid in there.
Like I said the filling and the sauce is amazing, but find another recipe for the dough. There are more detailed and better ones out there.
Jeanette says
Hi! Just wondering if I used already pureed butternut squash how much would the recipe call for? I have frozen, pureed organic squash.
Thanks!
Amy Taylor (comment moderator) says
Hi there. This is a good reference to have on hand: http://www.almanac.com/content/measuring-vegetables-recipes.
Ikue T says
I just made these, using 100% organic whole wheat flour for the pasta dough. I used my own pasta dough recipe, which called for less eggs also.
I loved the butternut squash filling! I omitted butter and maple syrup but it was totally sweet, creamy and delicious. I also boiled cubed, peeled butternut squash instead of baking in the oven for shorter cooking time. It worked out great. It is quite a bit of work especially if you're doing this alone, but outcome is worthwhile. I like to add chopped toasted hazelnut and crumbled blue cheese in the brown butter sauce. Yum!
Ashley says
This definitely was a lot of work but well worth it. They came out great!
Betheny says
Hubby and I made this tonight and to call it an epic failure is an understatement. We both were unsure about the dough, due to the recipe calling for only flour and eggs. We had everything on hand, so we gave it a try. I am not sure if I am more upset about the recipe failing, or the mess in the kitchen. After one bite, we spit it out and ordered pizza. I will try it again, but using my grandmothers recipe for dough. On a side note, if you don't have the tool needed to fill the ravioli, you're in for it. It makes life much easier and less messy.
Dena says
The whole family enjoyed this delicious fall supper tonight. I wish this recipe had made the cookbook!
Megan B says
How many does this make? I've never made pasta before and am thinking this would help me get an idea for how thin to roll the dough. (No pasta machine here:)
Assistant to 100 Days (Amy) says
Hi Megan. It make approximately 2 dozen raviolis. ~Amy
Emily says
I tried this recipe and loved the filling, but my raviolis left something to be desired. I had only white flour, not sure if that has anything to do with it...I also do not have a ravioli 'tool', just used a pizza cutter to separate and a fork to seal. The raviolis were doughy and chewy...any ideas how I can fix it?
Assistant to 100 Days (Amy) says
Hi Emily. Yes, the white flour would have created a different texture and consistency. Try again with wheat. :) ~Amy
Donna says
Our family just made this in preparation for for our "MeatFreeMonday". My husband who is our pasta maker was a bit dubious about using a different flour. (First time using whole wheat flour for him) but he commented that it was the easiest pasta making experience he had had. Our teenage daughter came over to help make the parcels and ended up eating the squash filling by the spoonful. We are now wishing we weren't heading out for dinner but were trying the cooked results tonight. Hurry up Monday.
Angela says
This recipe sounds great! Will be making soon but...you should never brown butter. Browning butter is heating it past its smoke point, when this happens you are creating free radicals within your body. The evidence of free radical damage is all the brown spots (aka- liver spots) found on the hands, arms,and face as we age. The bigger and more spots, the more free radical damage done inside the body.
Leslie says
Is it possible to substitute olive oil for butter? I made the ravioli but haven't tried the sauce yet. It was a fair amount of work but I think it will be worth it.
Assistant to 100 Days (Amy) says
Hi Leslie. It should work fine. ~Amy
Kali H says
I'm pretty sure having a pasta machine would make your life easier when it comes to this recipe. As I do not I have to use a rolling pin...not fun! My pasta was just too thick but the filling was AMAZING!
Jill Bugnacki says
Was wondering about a possible substitution for the eggs or different pasta recipe? My son has an egg allergy and we just don't cook with eggs.
Thanks
Assistant to 100 Days (Amy) says
Hi Jill. There are many egg-less pasta recipes out there but none that we have tested. Some use "flax eggs" to bind and others leave the ingredient out completely. You might have to look a little harder for one made with whole grain. Try here: http://www.yummly.com/recipes/whole-wheat-pasta-vegan. ~Amy
Blair says
Jill,
A good shortcut to making ravioli pasta is egg roll or wonton wrappers. There are vegan brands so there will be no egg!
Rebecca says
Hi all. I made this for dinner tonight using regular while wheat flour. It was my first time making pasta. I thought the dough looked dry and uses my hands to mix as I don't have a dough machine or pasta maker. The pasta was so yucky :'( we love butternut ravioli usually and I was so excited to try. Do u have any suggestions? I think it was too thick but maybe the whole wheat was too much? I froze the rest of the mixture and plan to try again. I would love anything to improve. Thank you! I love your recipes!
Assistant to 100 Days (Amy) says
Hi Rebecca. Handmade pasta can take practice to get it just right. It is easy to be a little heavy handed with flour when rolling out your dough, which can leave the pasta tasting too flour-y. Could that have been your issue? ~Amy
kristi says
I received a kitchenaid with the pasta attachment as a gift for christmas. Can't wait to try this out. Sounds like lots of oatience needed for the first time :)
Dale Gluck says
You did not state how many servings this recipe makes. How many do you usually get out of it?
Assistant to 100 Days (Amy) says
Hi Dale. Most of Lisa's recipes are made for a family of four with some leftovers. ~Amy
Nikki says
I tried to make these tonight and failed! I used a fork in a bowl to mix it up and my dough came out super sticky. How do I get it to stick to itself instead of everything else?
Alina says
I tried this recipe this evening and it turned out delicious!!!
Karris says
OK, so this was really not good- hardly edible really. The filling was waaaay too sweet, and the pasta was tough and grainy and blegh (pasta could have been an execution issue on my part).
However, in a momentary stroke of genius, I poured too spicy vegetarian chili from the day before over the leftover filling and it was AMAZING. Like, literally one of the best things I have ever tasted. I have eaten it for lunch 5 days in a row now. I intend on attempting to develop a recipe to combine the two.
Assistant to 100 Days (Amy) says
Hi Alisa. You can buy fresh sage in the produce section of any grocery store. It will be with other fresh herbs. And regarding the time, it completely depends on the individual and their experience with working with fresh pasta. It takes a little longer at first but gets easier (and quicker) with each experience. ~Amy
Alisa Duncan says
Where do you buy sage? I've never tried it before? And do you know about how long it takes to complete step 5 once the dough has rested and is ready to go through the pasta machine?