A few readers have shared a homemade “goldfish” crackers recipe with me. I decided to try the recipe (with several modifications), and while the outcome tasted good, the process of rolling out the dough took some time and made a huge mess.

Want to Save this Recipe?
Enter your email below & we'll send it straight to your inbox. Plus you'll get great new recipes from us every week!
As a busy mom I am a big fan of shortcuts, so the goldfish recipe inspired me to come up with these easy cheesy crackers. Making your own “crackers” from scratch sounds like such a daunting task, but trust me…this recipe is ridiculously easy!

Of course if you make this “easy” version you end up with round crackers as opposed to fun little shapes, but the last time I checked my daughters didn’t discriminate against a circle. They were too busy gobbling up these crackers and asking for more to even think about what shape they were eating.
And these are by no means just for kids. There are so many ways to get creative, which would surely impress any adult as well. Before baking experiment with adding some of these spices to the dough:
- black and red pepper
- fresh or dried rosemary
- diced olives
- diced jalapeños.
Or instead of mixing in herbs and spices, just top off the baked cheese crackers with something fun like pesto and grape tomatoes (just like we did for our dinner club last year). No matter what you end up doing, have fun with it and enjoy!
Easy Cheesy Crackers
Ingredients
- 1 cup whole-wheat flour
- 5 tablespoons butter (cold (cut into tablespoon size chunks))
- 1 ½ cups cheddar cheese (grated (the sharper the cheese, the cheesier the crackers))
Instructions
- Preheat oven to 350 degrees F.
- Combine all three ingredients in a food processor and blend. The mixture will eventually turn into one big ball chasing itself around the bowl. Be patient because it can take a few minutes.
- Roll the ball into a log about 1 ½” in diameter. At this point you could refrigerate the dough until later.
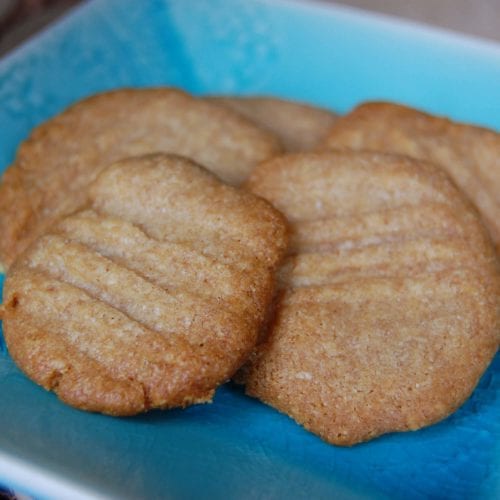
- With a sharp knife slice ¼” thick pieces off the log (pictured above) and place each one flat on an ungreased baking sheet. Try to rotate which side you are cutting down on because the top of the log does start to flatten a little. It is like your very own homemade slice and bake!
- If you want your crackers to look a little fancy (as pictured above) take a fork and gently mash down the top of each one before baking.
- Bake for 8 - 14 minutes or until golden brown. The thicker the crackers the longer it will take.
These crackers can be stored in the freezer so double the recipe and save some for later!
Notes
Nutrition Facts
Entered on Food Renegade's Fight Back Friday


Jamie says
Does the recipe call for salted or unsalted butter?
Amy Taylor (comment moderator) says
Either. :)
Kathleen says
Just made these and they turned out great! I made a few with salt & pepper on top; those are my favorite. I sliced them about 1/8 inch thick, and they all turned out crispy at around 12 minutes. I wonder if some people's issues with crumbly-ness is from how different people measure flour differently? Scooping will yield a different amount than fluffing up the flour and lightly spooning it into a measuring cup. Weighing probably yields something else. If you had trouble with texture, maybe try using a little less flour? These are so tasty, they're worth another try!
Sara Hertzog says
YUM! These taste great and love the easy method of cutting a log. I have made homemade wheat thin crackers before and they are a P-A-I-N to roll out and bake. Only eat a couple of these though, all that butter makes them pretty rich (I think).
Emily says
Hi,
Is it possible to make this without using a blender or food processor? I'm concerned that the thick dough will just get stuck. Would using a fork or knife to cut the butter into the flour work?
Amy Taylor (comment moderator) says
Hi. Some readers have. It is a very thick dough and will require a good bit of working it with your hands.
Yvette says
Do you happen to have nutrition info for this recipe? I'm counting calories but oh my these sound good.
Amy Taylor (comment moderator) says
Hi. We do not provide those details. This post might help you understand why: https://www.100daysofrealfood.com/2013/01/04/healthy-eating-defined/.
Monet says
Anyone tried adding chia seeds for a little nutrient boost?
Carrie says
Have not made these yet, but am wondering what the shelf life is of the already baked crackers?
Amy Taylor (comment moderator) says
You can keep them in an airtight container for up to a week.
Tracy says
These taste amazing! I just made them, and they turned out great. I did need to bake them longer, though. I sprinkled a little sea salt on top before baking. I love using Young Living essential oils in my recipes, so next time I may add a drop of rosemary or black pepper for a little extra flavor.
Anna says
i made these yesterday and they turned out great! How made calories per serving do they have?
Amy Taylor (comment moderator) says
Hi there. We aren't calorie counters. This helps explain: https://www.100daysofrealfood.com/2013/01/04/healthy-eating-defined/. :)
Mm says
Just made these with sharp cheddar. Yes it took longer like 20 min. Next batch I'm adding salt and tumeric for color. Dough is easy to make - it does take time to get it to ball. The rolling out is tricky so cookie cutter shapes may be too labor intensive.
Bronwyn says
Made these today for my 3 1/2 year old - added in tblsp coconut oil and seseme seeds and a touch of sweet paprika powder - delish!!! Made them by hand - just softened the butter a little and we rolled them into balls and swished them down - little man loved doing this bit!! Will definitely be making them again.
Kendra says
Have you tried using small cookie cutters to make fun shapes? Just wondering if that will work. Can't wait to make these!
Amy Taylor (comment moderator) says
Hi there. Sure, that will work!
Kelly says
Do you know if a cheese alternative can be used. We are dairy free here.
Barb says
Can you make this without a food processor?
Amy Taylor (comment moderator) says
Hi Barb. You can make it by hand but it is a thick dough. It requires a good bit of elbow grease.
Wendy says
I used my cutting blade to make and it just ended up crumbly instead of in a ball...should I have used my dough blade instead?
Amy Taylor (comment moderator) says
Yes, this is the consistency of a very thick dough. :)
Evelyn says
just tried this recipe.......took twice as long to bake as recipe said. also found then quite greasy even though i used the correct amount of butter.......not as tasty or light as I thought they would be.
shannon says
I think I followed this recipe correctly but all I got was a crumbly mess. I tried to bake what little bit did hold together but those were just crumbly blobs. Any suggestions.
Amy Taylor (comment moderator) says
Hi there. I have had to adjust this a bit from time to time and others times it has been spot on. Not sure why it has varied. Anyway, I have both added a little more butter or reserved a couple tablespoons of flour and added it back in depending on consistency.
Karen says
I wonder if it varies on the humidity in the air? I'm making these tonight, and we have storms rolling in :) Thank you for the recipe!
Amy Taylor (comment moderator) says
Not that we've noticed.
Stephanie says
I live in an area in the south where the weather effects any recipe with flour. My bread & pizza dough recipes vary depending on the season & weather. I just have to know what consistency things are suppose to be. Sometimes my flour measurements in doughs almost double!
I'm making this exact recipe now....looking good so far!
Sheryl says
Can unsalted butter be used?
Amy Taylor (comment moderator) says
Hi Sheryl. Sure it can.
Amy Taylor (comment moderator) says
Hi Erin. You can. You can also freeze the crackers.
Kathryn Grace says
THANK you for this recipe. These are by far the easiest and the tastiest crackers I have ever made. There is not one store-bought cracker we would rather eat.
Made them for the first time today. I rolled the log in waxed paper and froze it for 30 minutes, then cut thinly (about 1/8") with a sharp knife. Super easy!
Baked them at 350F, as you said. In my oven, it took about 20 minutes to get them nice and crispy.
We had to force ourselves to stop eating them. I know the grandkids will love them better than store bought, and they will enjoy helping to make them too.
Stephanie says
If you are making this the first time and realize your dough hasn't come together in the food processor...try this before throwing it away! I added 2 additional Tbsp of butter and about 1/4 cup of additional cheese. The dough came together and I sliced the dough about 1/8 inch. The crackers turned out great! Next time I will reduce the amount of flour so the additional butter and cheese are not needed.
Abby cole says
Hi, I was wondering how long I can leave these out in a container or if they need to be refrigerated? Either way, how long do they stay good in either spot?
Amy Taylor (comment moderator) says
Hi Abby. They are fine in an air-tight container for a day or two in your pantry but beyond that I freeze them.
Megan says
I just tried these without the cheese (we just ran out) but used cut up almonds,spinach and some honey with a little salt on top. They are sooo good! Thank you for the recipe!
Kelly says
These did not go over well atu house. Even my hubby who likes "healthy" things Gave them a thbs down. Wondering if I did something wrong?
Amy Taylor (comment moderator) says
Hi Kelly. You likely did not do anything wrong. I think for many the problem might be expectations? If you are expecting a thin crispy "goldfish" like cracker, this one is obviously a different texture and taste. I have rolled these thinly out, scored them to break them apart after baking, salted them, and my kids really like them that way. :)
Jasmine says
Unfortunately, I don't think I'll be making these again. I was so excited to try these since they're so simple, but I was quickly disappointed. I don't have a food processor so I was leading the dough by hand. It was so crumbly and dry i had to add water just to get it to come together. I refrigerated the dough until very firm but still couldn't slice it thin because it just fell apart. To me these didn't have much taste at all and I used the sharpest cheddar I could find. Any tips for improvement??
Amy Taylor (comment moderator) says
Hi Jasmine. I've gone a little heavier with the cheese from time to time. You might give that a try. Also, you can see my comment below as I've experimented to make a crunchier version. I think taste and preference is in the eye of the beholder. :)
Debbie says
I'd like to try using unsalted butter and adding a little parm to get that saltiness.
Leah says
So I followed the idea of putting the dough in the fridge for a few hours to get it super cold so I could slice the crackers thin. Worked great. I baked them like the previous commenter said - 250 for 20 min. But they weren't getting done so I upped the temp to 350 and did another 6 or 7 min. They all look great but about half of them were sliced thinner than the other half. The thinner ones actually don't taste very good - kind of burnt tasting - even though they look perfectly great. Also, I didn't see to use salted butter so I feel like they need a bit of salt added. I think I'll try again but cook them less and use the salted butter plus maybe try adding some very finely chopped rosemary or garlic powder or something. My toddler loves garlic.
Heather says
Okay, these crackers are Ah-mazing. Yummo. I've made them only once so far, but I already learned one trick. I made one tray of crackers right before bedtime. Didn't have enough time for the 2nd tray, so I put the other half of the dough in the fridge overnight. This morning it was so hard that I was able to cut it very, very thinly (1/8 inch) and I baked on 250 F for about 20 minutes (I was also make granola, hence lower temp). Anyway, the thinner crackers turned out super crispy and DELICIOUS.
Rachael says
I was wondering if these would still blend well if I don't have a food processor? Would mixing these by hand work just as well?
Amy Taylor (comment moderator) says
Hi Rachael. You can make these by hand much like you would a pie crust. ;)
Paula says
The first time we made these, no one was a fan. We tried again, now we cannot keep them in the house long enough to cool! Our biggest obstacle was trying to get them uniform in size, so we put the dough into a cookie press and they were all cooked to the same perfection!
Ange says
Was so excited to try this recipe because it sounded like it was right up my alley! Unfortunately, the dough was so crumbly when trying to roll it, and cut it :-(
I tried adding a little water, freezing the dough to make it easier to cut...nothing worked. I might try it again, but I'm not sure.
Melissa says
I made these and everyone who tried them loved them :)
I just used what I had on hand: all-purpose flour and mozzarella cheese.
It was fantastic! Thanks so much for sharing such a simple recipe. And they lasted in a ziplock bag for at least 2 weeks.
Tracy says
Wanted to love these but unfortunately none of us liked them :( Not bad but not something I'll try again.
Juanita Stovall says
These are fab-u-lous! Just baked them on lightly oiled cookie sheet using coconut oil and added sea salt and fresh cracked black pepper. I added about a teaspoon of water to help dough bind rolled into log as pictured then froze it for it about 20 minutes to facilitate being able to slice thinner. Made about 36-45 nice little cracker rounds. Thanks for all the ideas, recipes, tips. 2days in and 8 to go then we will see about the rest or October.
Dawn says
I made two versions of these. Bigger thicker ones that seemed strange to me because they reminded me of a giant cheese cookie. Then I made small thin ones which came out great! Just like crackers:) However, I put the leftover dough in the refrigerator in an air tight bag. The next day the dough was like a hockey puck. Maybe I shouldn't have put it in the air tight baggie. Any ideas on how I would soften it and still be able to use it??
Amy Taylor (comment moderator) says
Hi Dawn. Sorry, we are often unable to answer recipe questions quickly. Were you able to salvage it?
Dawn says
Hi Amy...no worries. I wasn't able to salvage the dough, but glad I got to try them! :)
Carla says
These are a big hit in my house!Has anyone tried to freeze the dough or the crackers?
Amy Taylor (comment moderator) says
Hi Carla. You can freeze either. ;)
Jenae says
I tried this last night and I think I did something wrong :( the dough would not come together so I tried to knead it by hand. It would not come together and stayed crumbly. So I compacted it the best I could and then cut them. When they came out they look exactly like the picture. But they came out hard yet completely fall apart into crumbles in your mouth. They did not taste good. I will try again with a different food processor and maybe less flour
joy says
Do you think I could use my vitamix to mix it?
Amy Taylor (comment moderator) says
Hi Joy. I am not sure. That is not something we have tried.
Chantelle says
I just tried this with my Vitamix and it didn't go well. :-\ Did you try it?
sarah says
Made with stoneground kamut....delicious and DBL the recipe as they go fast!!
Anna says
Hi, can I make the dough the day before, leave it in the fridge, and then slice and bake the next day? Thanks!
Assistant to 100 Days (Amy) says
Hi Anna. You can but make sure you have it wrapped up airtight or it could dry out. ~Amy