A few readers have shared a homemade “goldfish” crackers recipe with me. I decided to try the recipe (with several modifications), and while the outcome tasted good, the process of rolling out the dough took some time and made a huge mess.

Want to Save this Recipe?
Enter your email below & we'll send it straight to your inbox. Plus you'll get great new recipes from us every week!
As a busy mom I am a big fan of shortcuts, so the goldfish recipe inspired me to come up with these easy cheesy crackers. Making your own “crackers” from scratch sounds like such a daunting task, but trust me…this recipe is ridiculously easy!

Of course if you make this “easy” version you end up with round crackers as opposed to fun little shapes, but the last time I checked my daughters didn’t discriminate against a circle. They were too busy gobbling up these crackers and asking for more to even think about what shape they were eating.
And these are by no means just for kids. There are so many ways to get creative, which would surely impress any adult as well. Before baking experiment with adding some of these spices to the dough:
- black and red pepper
- fresh or dried rosemary
- diced olives
- diced jalapeños.
Or instead of mixing in herbs and spices, just top off the baked cheese crackers with something fun like pesto and grape tomatoes (just like we did for our dinner club last year). No matter what you end up doing, have fun with it and enjoy!
Easy Cheesy Crackers
Ingredients
- 1 cup whole-wheat flour
- 5 tablespoons butter (cold (cut into tablespoon size chunks))
- 1 ½ cups cheddar cheese (grated (the sharper the cheese, the cheesier the crackers))
Instructions
- Preheat oven to 350 degrees F.
- Combine all three ingredients in a food processor and blend. The mixture will eventually turn into one big ball chasing itself around the bowl. Be patient because it can take a few minutes.
- Roll the ball into a log about 1 ½” in diameter. At this point you could refrigerate the dough until later.
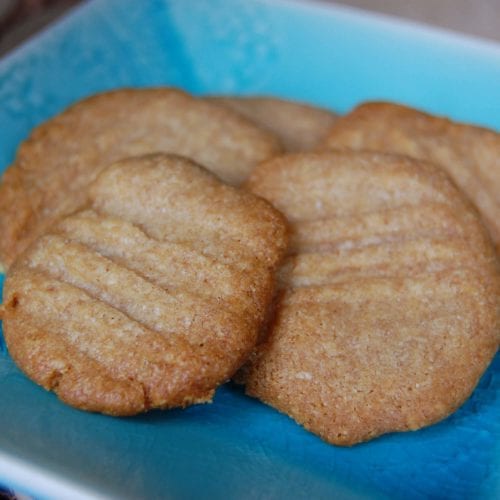
- With a sharp knife slice ¼” thick pieces off the log (pictured above) and place each one flat on an ungreased baking sheet. Try to rotate which side you are cutting down on because the top of the log does start to flatten a little. It is like your very own homemade slice and bake!
- If you want your crackers to look a little fancy (as pictured above) take a fork and gently mash down the top of each one before baking.
- Bake for 8 - 14 minutes or until golden brown. The thicker the crackers the longer it will take.
These crackers can be stored in the freezer so double the recipe and save some for later!
Notes
Nutrition Facts
Entered on Food Renegade's Fight Back Friday


Kim says
Is there a way to substitute the whole wheat flour with something else that’s more keto friendly? Thank you!
100 Days Admin says
Hi, we haven't tested this recipe out with anything else since Lisa doesn't follow any other diets, except whole food diets. - Nicole
Steffi says
Hi! I used to make crackers like this from the appetizer section of the original Joy of Cooking. I remember adding a splash of Tabasco sauce or perhaps some hot pepper flakes, or perhaps dill weed! I would make the big log and bake half of it as crackers, and store the rest of the log in the freezer for when guests would come by! It's a great recipe and always a big hit! Now I am older and ask you: I would like to avoid adding the butter or similar to the recipe. What can you substitute as low-fat for the butter? I don't mind the fat in the cheese as I love cheese, but want to avoid the butter. Thank you, stay safe, stay well. Stephanie in Baltimore Maryland.
Lisa Leake says
Yes, something spicy would be good in these! And butter is definitely a real food our ancestors have been using for centuries before us. So it's not something we feel we need to avoid.
Thara kumar says
Can l use processed cheese
100 Days Admin says
Hi Thara, recommend organic and in block form. Check out this post for more information about cheese: https://www.100daysofrealfood.com/cheese-and-other-dairy-products-are-they-processed/
- Nicole
Laura says
After reading all the raving reviews I was so excited to try these as we are brand new to making the switch to real food. The main meals so far have been a hit and I got the bread down, but I am having the hardest time with this recipe! I followed the directions and while the cheese flavor was ok the texture was horrible!! They were the consistency of sawdust when you bit into them! I have 5 kids and none of them (or myself) could even eat one whole cracker. Any idea what I did wrong or if anyone else has had this problem? Thank you!
Lisa says
Did you follow the recipe exactly and were all your ingredients fresh? Whole-wheat flour eventually spoils (unlike white flour).
Kim Ketchum says
Really good! I will use unsalted butter the next time. I also will roll the log long and skinny and cut them very thin. I like them crispy. These would be a great little add on to a salad. Will definitely make again.
Eileen Hebert says
Have you ever added rice krispies to them?
Amy Taylor (comment moderator) says
No?
Stephanie says
What can you use if you don't have a food processor?
Amy Taylor (comment moderator) says
Hi there. You can make and knead by hand.
Jordanne says
I know this is an older recipe, but my one year old loves these! My trick is to put the flour in the food processor and then grate in the butter and cheese directly with the grating attachment. Makes them even easier and saves extra dishes :)
Bet says
I was scrolling through looking for hacks before we make these! Love this!
Peggy says
What kind of flour can be used if gluten free?
Amy Taylor (comment moderator) says
Hi. You could try a gluten free whole grain blend.
Vanessa says
Will almond flour work in lieu of the wheat?
Amy Taylor (comment moderator) says
Hi. Typically almond flour cannot be subbed 1:1 with whole wheat and we've made no subs in this recipe.
Amy says
Are you able to freeze the dough or the crackers? (Sorry if this is a silly question!). Thank you.
Amy Taylor (comment moderator) says
Hi. Sure, you can freeze this dough.
Emily Whitten says
What could you use instead of butter?
Amy Taylor (comment moderator) says
Hi there. We've not tried any subs in this recipe.