Want to Save this Recipe?
Enter your email below & we'll send it straight to your inbox. Plus you'll get great new recipes from us every week!
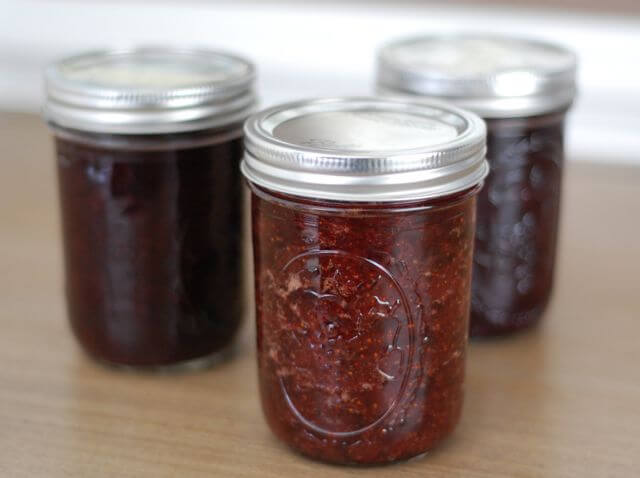
I hope this will be my first of several posts about how to “can” and preserve fresh foods when they are in season. I am a beginner canner myself, but have always been intrigued by and interested in the whole process. Below you'll also find a sugar-free strawberry jam recipe that you can make with just a handful of tools. (You don’t even need to use a canner!)
How to Can Jam Without a Canner: Sugar-Free Jam Recipe
So I recently took a “Canning Class” (led by Ashley Eller at Poplar Ridge Farm) and have also been reading through some other resources, including the Ball Blue Book Guide to Preserving. Prior to my class, I knew absolutely nothing about canning except that I thought it sounded confusing, complicated, and like something that would take an entire day to do (not true!). The recipe I'm sharing today is without pectin, (refined) sugar, or artificial sweeteners.
Featured Comment
I LOVE this jam. It’s really tasty, and the fact that it’s all natural is even better. I’ve never made jam before, so this made it super easy.
From one beginner to another, a few key points on how to can jams:
- In simple terms, canning food is cooking recipes (which most of us already know how to do) and then “processing” the results by putting them in sterilized canning jars and boiling or pressure “cooking” them for a designated amount of time. It really isn’t as complicated as I originally thought. :)
- It is important to use canning recipes from reliable sources. Especially as a beginner these are not recipes you want to modify or adapt in any way because each ingredient as well as both the length of time and temperature at which the jars are processed can be key components to ensuring food safety.
- You must use jars that are in fact suitable for “canning” with two-piece metal lids, which does not include old washed out Ragu spaghetti sauce jars. The most widely used brands of jars for canning are Ball and Kerr, and while the jars and bands (that go around the lid) are reusable you must always use brand new lids to properly can foods. Now I know why I see those packs of lids for sale.
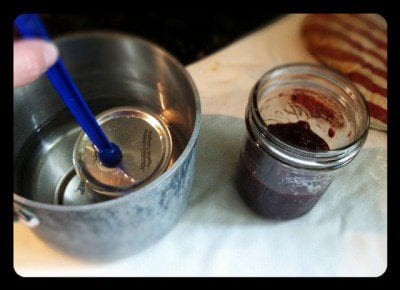
- It is necessary to sterilize the jars and lids before pouring in your jam (or other recipe). You can do this in hot water (180 degrees F), or if you can time things right run the jars and lids/bands through the dishwasher so they are hot and ready right when your recipes are done.
- According to the Ball Blue Book Guide to Canning to process high-acid foods like berries and tomatoes you simply boil them (in the jars), but you actually need to pressure can low-acid foods like asparagus, peas, and corn. So my personal plan is just to stick to the high-acid produce for a while until I really get the hang of things.
- If you aren’t sure if your foods “canned” properly your nose and/or a quick taste test should confirm whether a jar spoiled or not when you open it.
- You certainly can spend your entire day preparing big batches of recipes in order to preserve in-season produce when it’s fresh, but it does not have to be a huge production. In fact, I made a small batch (half the recipe) of the strawberry jam posted below in just over an hour…and I am a newbie. (More of a blueberry jam fan? Find a honey-sweetened recipe here!)
- Please share your canning tips in the comments below…I know some of you have been doing this for many years!
Some helpful tools to make the canning process easier:

The “need to have” canning tools...
- Jars (of course!) – I personally like the versions without shoulders so they are freezer-safe as well. (Hint: if you use the jars for freezing instead of canning be sure to leave room at the top for the liquid to expand.)
- Ball Utensil Set – This set includes a jar funnel, jar lifter, lid lifter, and bubble remover/headspace tool. I found the first three of these items to be invaluable, although I could probably live without the bubble remover/headspace tool (for now).
- A large pot – You’ll need one big enough to hold several sealed jars that could be covered with 1 – 2 inches of water. This does not have to be a “canning” pot (sometimes called a water bath canner)…any big old stockpot will do.
- A ladle – This is necessary to get your jam (or whatever you are making) from the pot to the jar.
- A digital or analog scale – Some recipes call for ingredients in weight measurements, but not all. I have an extremely basic analog scale and to be honest it totally does the trick.
- Potato masher – This was a necessary tool in order to turn my cooked strawberries into yummy, mushy jam.
The “nice to have” tools...
- Basic thermometer – To test the temperature of the water before sterilizing jars/lids.
- Canning rack – This is to lower the jars into and out of the boiling water when you are processing them and to provide space between the bottom of the jars and the pot (you can use other things like jar bands, silverware or even a dish towel to create that space). I don’t personally have one and I survived, but I can see the value if you are going to be doing a lot of canning. Just make sure the size you buy fits your pot if you aren’t getting a set!
- Dissolvable labels – I seriously love these things, but if you can’t justify the expense some regular old masking tape will definitely get the job done.
- Pressure canner – As I mentioned above I don’t see myself “pressure canning” anytime soon, but if you want to preserve low-acid veggies then this is a necessary piece of equipment.
- Immersion blender - you could use this as an alternative to the potato masher, to blend up the ingredients
6 Easy Steps to Can Strawberry Jam Recipe Without Sugar and Pectin
- Follow homemade jam recipe (as stated below).
- While it’s cooking sterilize the jars and lids/bands in hot water.
- Ladle the completed jam into hot, freshly sterilized jars one-by-one.
- Add jar lid to the top while keeping the inside sterilized.
- Screw on the bands and add jars to boiling water for 10 minutes.
- Remove jars and listen for the “pop” sound to ensure jar lids have been properly sealed. It’s that simple! :)

Strawberry Honey Jam
Ingredients
- 6 pounds strawberries (or blueberries or other ripe fruit)
- 3 ¾ cup honey
- 1 ½ apples (unpeeled and grated)
- 1 ½ tablespoons lemon juice (freshly squeezed)
Instructions
- Make JamRinse the berries and remove any spoiled or severely blemished ones. Hull strawberries and slice in half.
- Add the berries, honey, grated apple, and lemon juice to a large pot over high heat. Once the mixture comes to a rolling boil, lower to medium heat and allow the mixture to continue to boil lightly for approximately 30 - 60 minutes. The berries will burst and thicken so be sure to scrape the sides of the pot and stir as you go. The longer the jam cooks the thicker the final product will be, although this recipe does not become quite as thick as typical store-bought jam (see note below about adding arrowroot powder or chia seeds for thickening)

- Mash the fruit with a potato masher once the fruit begins to soften. If foam forms on top of the fruit you can skim with a metal spoon and discard if desired.
- Prepare Sterile Jars: Meanwhile fill the canning pot ¾ full with water, cover, and bring to a boil over high heat. If you don't have your jars sterilizing in a hot dishwasher you can use this pot of water to sterilize them. Also start a small pot of boiling water to sterilize the lids separately. Be sure to wash all jar pieces in hot soapy water first.
- Once the water is boiling turn off the heat. Test the temperature with your thermometer and when it reaches 180 degrees F put the jars and bands in the large pot and the lids in the small pot. Leave everything in the hot water until ready for use, removing one at a time as needed.
- When the jam is done cooking do a taste test to make sure the thickness and flavor is to your liking. Hint from Ashley: Drop dots of jam on a cold plate, if it seems to set up, it is done. You can also see if it coats the back of a spoon.
- Remove the first jar from the hot water using your jar lifter tool and shake out excess water. Don't touch inside of the jar in order to keep it sterilized. Insert clean canning funnel and ladle the hot jam into the hot jar leaving ¼ inch headspace at the top (this is where the headspace tool can come in handy - leaving more space at the top might not give as good of a seal). If there are any air bubbles you can slide a clean knife along the inside of the jar to remove them. Using a clean rag wipe excess off the outside of the jar and rim.

- Using a magnetic lid lifter pull the first lid out of the hot water and set on top of the jar without touching the bottom of it. Then while only touching the outside of the band screw it onto the jar just firmly enough so it doesn't feel wobbly on the grooves. Repeat until all jars are filled.

- Note (If you don’t want to actually “can” the jam): You could stop here and refrigerate jam for 3 – 4 weeks. To freeze the jam make sure you used freezer-safe jars, (Ball makes plastic jars for this purpose), leave at least a half an inch of space for expansion, allow the jam to completely cool, and put in freezer for up to one year. One additional tip for freezer jam is by placing a round of parchment paper on top of the jam, you can prevent ice crystals from forming.
- Process the Jars:Bring large pot of water back to a boil. Using your jar lifter (or canning rack) carefully lower as many jars that will fit without overcrowding into the boiling water so they are covered by at least 1 - 2 inches of water. It is recommended that the jars do not directly touch the bottom of the pot (so hot water can flow beneath them) and some even suggest putting a dish towel on the bottom to create space. From the moment the water is boiling and the entire first batch of jars are submerged set the timer and process them for 10 minutes.

- When 10 minutes is over use the jar lifter to carefully remove the jars from the water. Put them on the counter and don't move them right away. You will hear your jar lids "popping" which means they have been sealed properly. If jars aren't sealed within 12 hours then move them to the fridge and eat within 3 - 4 weeks.
- Remove bands from sealed jars and with a clean, wet cloth wipe off any jam that has congealed on the outside rim of the jar. This prevents mold from forming on the band. The band can be reapplied, but don’t screw them on too tightly.
- Label jar and store in a cool, dry, dark place for up to 1 year.


Notes
- You can optionally add in arrowroot powder or chia seeds as a way to thicken the jam. If you like jams with crunch, opt for the chia seed addition!
- We recommend organic ingredients when feasible.


Diane Y says
Wonderful! I've been making jam for several years now but I was really wanting something that didn't require 7 cups of sugar! Can't wait to try this.
I was taught to make jam by a friend who was taught be her grandmother and our method is slightly different: Follow the recipe for the jam as the recipes states, then fill the jars, clean the lips, put on the lids. THEN, we turn all the jars upside down and let them sit that way for 5 minutes. After 5 minutes, turn them back over and let them cool completely. Works a treat!
Kathleen says
I just learned today that botulism is odorless and tasteless so relying on your nose isn't always fool proof. Look for rising bubbles also to detect a poor seal and respect all the rules of canning! Do not deviate from the instructions :)
CouponCook says
The jars with "shoulders" are called regular mouth jars. The jars without "shoulders" are called wide mouth jars.
I wouldn't spend money on a canning rack to lift and lower jars. You can just use cardboard cut to fit the bottom of your pot.
Most important thing is to have a jar lifter from the ball utensil kit. Or really just have the whole kit.
you can use labels, but I usually just write on the lid. I'm throwing it out anyway.
as far as a pressure canner, I recommend the Presto 23 quart to begin with. you can stack jars in it and get twice the canning done. worth it to purchase an extra rack.
If you want to know, I can tell you how to make juice without a juicer. It yields a little less juice, but it still usually works out just fine.
100 Days of Real Food says
We reuse the lids when freezing foods in jars so we don't throw them out afterward.
CouponCook says
That is likely ok. I'm much more cautious, especially as cheap as lids are. Make sure to inspect the lids carefully. It is very easy to warp them or damage the rubber seal. Do not under any circumstances reuse previously frozen lids to water bath or pressure can. Best case you don't get a seal. Worst case you contract botulism. Ball makes a special freezer jar that can be used over and over again. I used to freeze my jam in plastic containers and used them over and over again. Now I successfully water bath and pressure can so I don't need the freezer anymore.
Happy Canning adventures to you.
CouponCook says
Oh, and lids and rusty rings can be recycled!
trace says
Nice.. I just wanted to tout a local product (to where I live in Western Colorado) http://www.reusablecanninglids.com/
tattlers lids are reusable and BPA free.. just wanted to share. thanks for all the inspiration!
CouponCook says
Have you used these successfully? I want to try them. Thanks!
sherry says
In North Carolina, the Union County Extension Office offers canning classes. Its an all day event and the instructor walks the participants through hot water bath and pressure canning. There is a high demand for these classes and they fill up fast, but check it out if you live in the area.
Stephanie says
I've made strawberry jam, blackberry jam and grape jely with my mother-in-law many times. She always pours hot wax on top of the jam once it is in the jars. After the wax hardens, she places a lid and ring on the jar and is done. When we open the jar to eat,there may be a small amount of mold around the wax. The wax pops out and you can take a spoon to scrape off any mold on the top of jam. The rest is all good!
Margaret says
This is a great recipe. I have canned a few times and love it, but I hate all the sugar most recipes call for. If you have more recipes please share! Otherwise I am guessing almost any fruit could be substituted for Strawberries.
Meggin says
Can anyone point me to info on canning other jam recipes without sugar or pectin? I've been canning for years, but have always wished for the recipes used before processed white sugar and boxes of pectin were available. Thanks for this recipe!
Sally says
Thank you for sharing. I found a recipe for apricot bars. Everything in the recipe was good: Oats, fresh ground wheat flour, honey, dried apricots - but the jam. I thought if I could make my own/??? hmm? and here it is. Think this recipe would work with apricots? Maybe I can make strawberry bars? Thanks again!
sarahp says
When in doubt throw it out! Do NOT taste test food that you think may not have been processed incorrectly. And if you have more questions or want to take a class contact your local extension office, they are full of helpful people.
Amber says
I was at a local natural foods store and mentioned canning this summer. It is something i have had on my list for a while. The owner informed me that I might want to just freeze the food as canning it makes the food lose its nutrients. Now I am at a complete loss as to what to do. I have already made freezer jam both sugar and sugar free. Does canning the food make a huge difference verses freezing?
100 Days of Real Food says
It's true...freezing is much better at retaining the nutrients than canning. I just personally really wanted to try canning and thought it would be good to have some homemade items stocked in the pantry in case our electricity went out for a few days. I can't imagine losing everything in the freezer! I also like the idea of canning for gifts.
Kristin says
Pectin is made from corn dextrose? Is there ANYTHING left in our food system not made with some derivative of corn? I thought I was doing good by making my own low sugar sur-gel jam from local strawberries and home grown raspberries. Frankly, I would have loved to cut the sugar even more, but sur-gel recipes specifically state that the jam wont set up with less sugar. Can't wait to try your recipe in another month when strawberries are in season! Does it matter what kind of apple is used, sweet, tart, etc. ?
100 Days of Real Food says
I used a Granny Smith apple, but Ashley's original recipe did not specify a certain variety.
Melissa@Mom's Plans says
Thank you for this recipe! We have been looking for jam without white sugar, and it is very hard to find. When you went to the class, did the teacher mention if there is any benefit to canning vs. freezing? I was planning on freezing because I don't have the canning equipment. Thanks!
100 Days of Real Food says
Freezing is better at retaining nutrients...and as I just mentioned in another comment I've just always wanted to try canning and thought it would be nice for gifts as well. Plus if our electricity goes out and we lose everything in our freezer we still have some homemade goodies we can eat.
RevAllyson says
Hey! Canning is *awesome*! :) Been doing it for years.
By the by, pressure canning is not all that complex, although it does add the extra step in there of having to bring your pot up to pressure and it takes a while. For example, canning chicken broth (without meat in it) takes 3 *hours* per batch. Oy. LOL... So totally worth it, though!
Couple of notes, though. It's not wise to run the lids themselves through the dishwasher. The excess heat can render the little rubber bits brittle, which bodes badly for your canned goods. Heating the lids in a pot of not-quite-boiling water is best, although everything else can go in the dishwasher, and I almost always do this so I have a large batch of jars ready. ;)
Yes, you do NEED to wipe the rims (even if they look clean) before putting the lids and rings on. Once they're on and you process them, that initial "pop" is a great sign but does NOT necessarily mean your cans are sealed properly. Do not rely on that. Instead, after your jars have cooled completely (ie overnight - do NOT move them in the time they're cooling down if at all possible), take a light teaspoon (metal) and ping it off the lids gently. They should all make the same tone of "ping" sound. If you have one that is not sealed, it'll make more of a "pong" sound. LOL... The "pings" are sealed, and the "pongs" are not.
Oh, and DO NOT GO POKING AT THE PRESSURE SEALS TO SEE IF THEY'RE SEALED! You can actually dislodge the seal by doing that. Only poke the seal as part of the process of opening the jar for use. That's your first line of defense. If it is still down, then it's probably fine. Still, when you open any home-canned jar, you go over it. Is the lid popped down? Does the lid open easily or do you have to pry it off? Does everything inside still look the same (generally speaking) as the day you put it up? Does it smell right?
Botulism is dangerous, yes, but a tiny taste is unlikely to kill you. The symptoms hit pretty quick, and if you think you are suffering from it, head to the ER immediately. There are only about 110 deaths per year due to botulism now (still horrid that *anyone* dies, but it's not a bad stat). On the other hand, botulism CAN kill children much faster than adults, so if there is any doubt, throw it out. If it smells, looks, or just doesn't seem right, toss it. Better to lose a few strawberry jars than your life.
Generally speaking, the water bath (and pressure canning for other items than acid ones) does kill pretty much anything. In 20+ years of canning, I've had... oh, maybe five jars go off, and every one of them was something that was obvious. In other words, the jar was full of mold, or the lid was bulging, or it STUNK when we opened it. The mold ones came from having a teeny tiny chip in the rim of my jars, so do check for that. :)
Alison says
Do you mean making the chicken broth and THEN canning it takes 3 hours? Because I just canned some of our homemade broth a couple of days ago and while it's a process - it didn't take 3 hours! It only has to maintain 10 pounds of pressure for 20 minutes if I'm remembering correctly - I always check my instruction book!
CouponCook says
She's probably including the time it takes to pressurize and subsequently depressurize the canner. Depending on how hot my kitchen is, it might take a few hours for this process to happen.
100 Days of Real Food says
I love all this helpful advice...thank you for taking the time to share!
Amber says
thanks for this recipe. I am a novice canner only beginning last fall when i canned a green tomato and apple chutney and pickled green tomatoes (both are delish!)i am about to make some freezer jam and broke down and bought instant pectin and regular pectin to see which I liked better. there is info about using honey as a way to replace part of the sugar but you still had to use sugar. so glad i won't have to now! I plan on using Ball's 8oz freezer jars which are BPA free. now to go get the strawberries! wishing all of us beginner's good luck w/our canning forays this summer!
Jennifer S. says
This looks so much easier (and better) than the strawberry jam recipe I use. I'm definitely going to try this this year.
Kristen says
Great great great! I'm getting a canning kit for Mother's Day (yes, I already know this because I picked it out ;) ) and now I have a recipe that doesn't even require pectin. Fabulous.
Also as a tie-in to a post you made on facebook about buying organic pop-tarts for your daughter to bring to school, you should try the recipe out below and make your own!! It is really easy and yummy too. I'm excited to do these up again once I have some homemade jam made (last time I used store bought), should be even more delicious!
http://heavenlyhomemakers.com/homemade-healthy-poptarts
100 Days of Real Food says
Thanks for sharing the recipe, but I asked my daughter today and she said she wants store-bought "pop tarts" instead of homemade. She did say she definitely wants organic ones though. Maybe we can work toward homemade at some point. I have never bought pop tarts in my life so our next visit to the store should be interesting!
Netta says
If choosing to freeze the jam rather than canning it, do I have to use a glass jar or can I use a BPA free freezer container?
100 Days of Real Food says
You can freeze the jam in any freezer-safe container...it does not have to be a jar.
Jessica says
As an OSU Extension Educator (and someone who teaches those canning classes) PLEASE DO NOT taste test food if you are worried that it is spoiled!! Look for cloudiness and/or unnatural color of the food. Also, do not check to see if the jar sealed properly for at least 24 hours after processing, as this could actually prevent the jar from sealing. Just leave the jars alone for a full day, then check.
lauren kelly says
I am excited for this post, thanks so much for sharing with us!
Amanda says
I'm also curious- is there any reason specifically to avoid the pectin? I made a batch of 24 jars almost identical to your recipe - but with pectin instead of apples. Is derived pectin a bad thing? Btw, ours turned out great- the honey does add flavor, but since we love honey, we prefer this over sugar jams.
100 Days of Real Food says
Some pectin brands are better than others and I'll probably use it at some point as well. But a powdered substance out of a packet just didn't feel very "real food" to me so I just wanted to try it without pectin first.
Crystal says
I'm so excited to see this post and recipe! Literally one day late for me, I just resolved to put my 2 gallons of strawberries in the freezer last night after putting off canning for the past few days. But, I'm calling my farmer today to see if there's another weekend of strawberries left...keep your fingers crossed for me! Looked and looked for a recipe without sugar or the powdered pectin, but to no avail. Yay! Yay! for 100 Days of Real Food :)
Julie says
I'm so excited! I just recently bought jars (on sale) and I have been patiently waiting for my local farmers market to open so I can start making jams. I've never done it before but I am looking forward to trying it out. Love that this recipe doesn't need additional pectin AND doesn't have a lot of added sugars/sweeteners like some of the recipes I've seen.
Katie | Healthnut Foodie says
My sis-in-law and I just began canning pickles last summer. I am excited to expand to tomatoes and jalepeno relish year! So fun, and what an awesome tutorial!!! Thanks Lisa!
Candelyn says
Lovely!!! I was wondering what you would do about the sugar. And it is genius to add the shredded apple for the natural pectin! Just some additional information on canning: Jam has a high sugar content (the honey in this place) so it will not usually spoil. Even weeks and weeks in the fridge. Or months or years if canned. People used to just pour some hot wax over the top of a jar to seal it. And it would last in the cupboard for months. And even then, after being "opened", the only kind of spoilage it would get would be a bit of mold which could be scooped off and the jam underneath would still be good. Sugar is a preservative. It doesn't allow most germs to grow. But canning without high sugar content(or the honey equivalent) carries more risks. Even tomatoes (because new varieties have far less acid than our ancestor's tomatoes) can grow botulism---which one tiny taste of an infected jar will kill you. So I would recommend pressure canning ALL of that kind of produce. Jam, however, is worry free. ; ) (Also, to Jodi---yes, frozen strawberries work great.)
Karen says
Great Advice Candelyn!
Jamie says
Can the honey be left out? I have made a fruit spread with just the berries, apple juice and pectin.
100 Days of Real Food says
Well it sounds like it would be a whole different recipe if you did!
Jennifer says
We always write on the lid with a sharpie (usually just the year if the flavor is obvious). My family has canned tomato juice using a food mill for as long as my mom can remember...I didn't know you could buy tomato juice at the store until I was an adult! We have never "processed" the juice...hot (boiling) juice goes into hot jars and then we wait for the pings to signal that the jars have sealed. This works for tomato juice b/c it's acidic...we do process other items. I have a recipe for dilly beans (dill, vinegar, garlic, green beans) that I'll try to remember to post - YUM!
I'm SO excited for fresh strawberries to be available...I'm down to my last few spoonfuls of freezer jam!
Joy says
Jennifer, your comment made me smile! My sister had a bumper crop of Scuppernong grapes - both red and white last year. I do not own a food mill but wanted to make grape jelly/jam last year. I'm also cheap and didn't want to buy one! I cooked the grapes per recipe directions and ladled portions into my handheld net/wire sieve and squashed the mess outta them! :) Took a little long but it worked! I made TONS of grapes jelly/jam and gave lots away as gifts. I received many compliments and we liked it so I guess it worked! :)
katie says
Can you use raspberries in place of the other berries? I believe raspberries make their own pectin.
100 Days of Real Food says
You might be able to, but to be honest I am not 100% sure since I am still so new to canning!
Karen says
Thanks for the honey sweetened jam recipe. I would like to reduce our processed sugar consumption.
One thing I noticed you did not mention in your directions is to be sure to wipe the rims of the jars competely clean before putting the lids and rings on. Otherwise, your jars may not seal.
If you can get ahold of some crab apples, you can make your own pectin for adding to other jams. Jennie--most commercial pectin is derived from orange/lemon/citrus pith and corn dextrose, but using commercial pectins require large quanities of sugar. So it's great to see a honey sweetened recipe!
Thanks!
100 Days of Real Food says
Thanks for the tips!
Pranee says
Oh lovely, just what I have been searching for, a strawberry jam canning recipe that doesn't contain sugar or pectin. Thank you Lisa :)
Jennie says
Oh, btw--should the recipe say six pounds or six pints? Six pounds sounds like a LOT of strawberries to only make 5 pints of jam.
Jennifer says
Pounds is probably correct...the berries cook down a lot.
100 Days of Real Food says
6 pounds! :)
AmyM says
My sister always borrows one of my nephew's crayons to label her jars. After removing the jars from the water bath she writes on the still warm lids. The wax from the crayon hardens, and won't rub off.
Jessica says
It's best to not touch the lids while they are still warm. This can prevent them from sealing. She could label her lids with a sharpie before processing.
Melanie says
I label mine with a Sharpie after they're cool. I've found that the Sharpie doesn't hold up to the pressure canner.
Jennie says
What is the reasoning behind not using pectin? I see how you're using apple in place of it--but I thought purchased pectin was derived from apple anyway.
I'll be canning some strawberry jam on Sunday--looking forward to it!
Do you find the honey to have a strong flavor? I was surprised recently, when I did a taste test, how averse I was to honey in my coffee. Similarly with molasses, which I thought I'd love; I ended up with Grade A maple syrup, which works just fine as a coffee sweetener for me.
100 Days of Real Food says
As I said in some of the other replies I just wanted to avoid the package of powder the first time around...I'll probably use it at some point. I've purchased a few different brands of pectin and some seem "cleaner" than others.
100 Days of Real Food says
Oh and I liked the honey in this recipe, but sometimes I don't like it as much as other sweeteners (especially if it's not cooked). I prefer maple syrup as a sweetener for my morning mocha as well.
Sharon Severson says
I see you answered my comment here already, thank you again. Honey is much better as a sweetener in the jam, maple syrup in the coffee or on the banana pancakes :)
MamaBear says
Yet another recipe that i can't wait to try! We have wild grapes in our park so we like to make grape jelly every fall. I was where you are only a few years ago and am so much more comfortable around the process now. Practice makes perfect right? :)
When i started i didnt have a lid lifter or a funnel. I improvised by cutting the bottom off a milk jug to make a funnel and used a tongs to reach my lids.
My favorite canning recipe is the salsa recipe on my blog...if you like hot chunky salsa...you will like MamaBear's not so mild salsa ;)
Stephanie says
Thank you so much for this! I tried to make some pectin free jelly a couple weeks ago, but it made more of a sauce. I will definitely be trying this recipe!
Ashley Eller says
Wonderful post! So happy you were able to use this recipe on your own at home. Thanks for coming to the class.
Jodi says
I have some frozen strawberries....would these work or should I get fresh ones???
Melissa says
Frozen works fine, made some the other day. Just thaw them first
100 Days of Real Food says
The blueberries we used in the class were previously frozen so I think it should work!
Leigh says
Great post. I began canning a few years ago and I never looked back! I just recently found out (last season) that those canning lids have BPA in them. Low levels, but still. . . Last season I found Tattler lids and I bought a few boxes. They are amazing- BPA free, and reusable. Check them out:
http://www.reusablecanninglids.com/
I only use them for jars I'm going to keep, because they are so expensive, but I'm working towards owning more.
Bruce Bradley says
Great post, Lisa. My son and I have enjoyed canning jams since he was 5 years-old. We make enough for our family and then can extras to give away as holiday gifts. One thing to check out is many commercially available lids contain BPA (something I only learned recently). If you're concerned about BPA contaminating your food, there are some BPA-free varieties you should check out.
Happy canning!
Bruce
Lora says
So excited to get started canning with this recipe! Going strawberry picking next weekend! It's something I've always wanted to do!