Want to Save this Recipe?
Enter your email below & we'll send it straight to your inbox. Plus you'll get great new recipes from us every week!
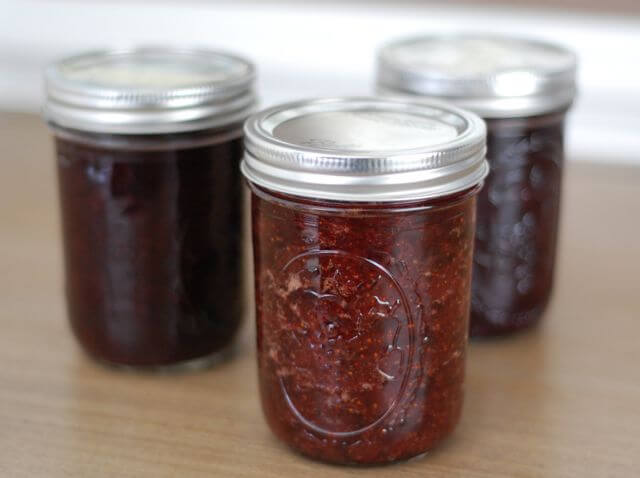
I hope this will be my first of several posts about how to “can” and preserve fresh foods when they are in season. I am a beginner canner myself, but have always been intrigued by and interested in the whole process. Below you'll also find a sugar-free strawberry jam recipe that you can make with just a handful of tools. (You don’t even need to use a canner!)
How to Can Jam Without a Canner: Sugar-Free Jam Recipe
So I recently took a “Canning Class” (led by Ashley Eller at Poplar Ridge Farm) and have also been reading through some other resources, including the Ball Blue Book Guide to Preserving. Prior to my class, I knew absolutely nothing about canning except that I thought it sounded confusing, complicated, and like something that would take an entire day to do (not true!). The recipe I'm sharing today is without pectin, (refined) sugar, or artificial sweeteners.
Featured Comment
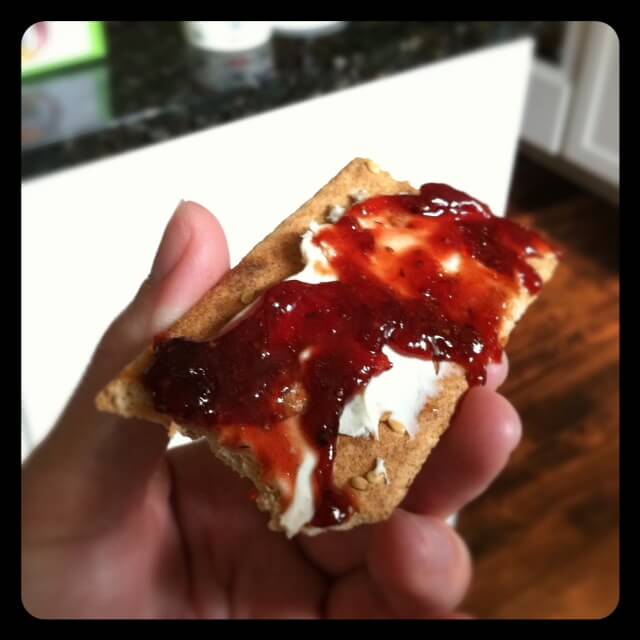
I LOVE this jam. It’s really tasty, and the fact that it’s all natural is even better. I’ve never made jam before, so this made it super easy.
From one beginner to another, a few key points on how to can jams:
- In simple terms, canning food is cooking recipes (which most of us already know how to do) and then “processing” the results by putting them in sterilized canning jars and boiling or pressure “cooking” them for a designated amount of time. It really isn’t as complicated as I originally thought. :)
- It is important to use canning recipes from reliable sources. Especially as a beginner these are not recipes you want to modify or adapt in any way because each ingredient as well as both the length of time and temperature at which the jars are processed can be key components to ensuring food safety.
- You must use jars that are in fact suitable for “canning” with two-piece metal lids, which does not include old washed out Ragu spaghetti sauce jars. The most widely used brands of jars for canning are Ball and Kerr, and while the jars and bands (that go around the lid) are reusable you must always use brand new lids to properly can foods. Now I know why I see those packs of lids for sale.
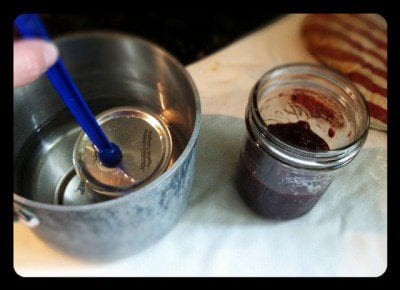
- It is necessary to sterilize the jars and lids before pouring in your jam (or other recipe). You can do this in hot water (180 degrees F), or if you can time things right run the jars and lids/bands through the dishwasher so they are hot and ready right when your recipes are done.
- According to the Ball Blue Book Guide to Canning to process high-acid foods like berries and tomatoes you simply boil them (in the jars), but you actually need to pressure can low-acid foods like asparagus, peas, and corn. So my personal plan is just to stick to the high-acid produce for a while until I really get the hang of things.
- If you aren’t sure if your foods “canned” properly your nose and/or a quick taste test should confirm whether a jar spoiled or not when you open it.
- You certainly can spend your entire day preparing big batches of recipes in order to preserve in-season produce when it’s fresh, but it does not have to be a huge production. In fact, I made a small batch (half the recipe) of the strawberry jam posted below in just over an hour…and I am a newbie. (More of a blueberry jam fan? Find a honey-sweetened recipe here!)
- Please share your canning tips in the comments below…I know some of you have been doing this for many years!
Some helpful tools to make the canning process easier:

The “need to have” canning tools...
- Jars (of course!) – I personally like the versions without shoulders so they are freezer-safe as well. (Hint: if you use the jars for freezing instead of canning be sure to leave room at the top for the liquid to expand.)
- Ball Utensil Set – This set includes a jar funnel, jar lifter, lid lifter, and bubble remover/headspace tool. I found the first three of these items to be invaluable, although I could probably live without the bubble remover/headspace tool (for now).
- A large pot – You’ll need one big enough to hold several sealed jars that could be covered with 1 – 2 inches of water. This does not have to be a “canning” pot (sometimes called a water bath canner)…any big old stockpot will do.
- A ladle – This is necessary to get your jam (or whatever you are making) from the pot to the jar.
- A digital or analog scale – Some recipes call for ingredients in weight measurements, but not all. I have an extremely basic analog scale and to be honest it totally does the trick.
- Potato masher – This was a necessary tool in order to turn my cooked strawberries into yummy, mushy jam.
The “nice to have” tools...
- Basic thermometer – To test the temperature of the water before sterilizing jars/lids.
- Canning rack – This is to lower the jars into and out of the boiling water when you are processing them and to provide space between the bottom of the jars and the pot (you can use other things like jar bands, silverware or even a dish towel to create that space). I don’t personally have one and I survived, but I can see the value if you are going to be doing a lot of canning. Just make sure the size you buy fits your pot if you aren’t getting a set!
- Dissolvable labels – I seriously love these things, but if you can’t justify the expense some regular old masking tape will definitely get the job done.
- Pressure canner – As I mentioned above I don’t see myself “pressure canning” anytime soon, but if you want to preserve low-acid veggies then this is a necessary piece of equipment.
- Immersion blender - you could use this as an alternative to the potato masher, to blend up the ingredients
6 Easy Steps to Can Strawberry Jam Recipe Without Sugar and Pectin
- Follow homemade jam recipe (as stated below).
- While it’s cooking sterilize the jars and lids/bands in hot water.
- Ladle the completed jam into hot, freshly sterilized jars one-by-one.
- Add jar lid to the top while keeping the inside sterilized.
- Screw on the bands and add jars to boiling water for 10 minutes.
- Remove jars and listen for the “pop” sound to ensure jar lids have been properly sealed. It’s that simple! :)

Strawberry Honey Jam
Ingredients
- 6 pounds strawberries (or blueberries or other ripe fruit)
- 3 ¾ cup honey
- 1 ½ apples (unpeeled and grated)
- 1 ½ tablespoons lemon juice (freshly squeezed)
Instructions
- Make JamRinse the berries and remove any spoiled or severely blemished ones. Hull strawberries and slice in half.
- Add the berries, honey, grated apple, and lemon juice to a large pot over high heat. Once the mixture comes to a rolling boil, lower to medium heat and allow the mixture to continue to boil lightly for approximately 30 - 60 minutes. The berries will burst and thicken so be sure to scrape the sides of the pot and stir as you go. The longer the jam cooks the thicker the final product will be, although this recipe does not become quite as thick as typical store-bought jam (see note below about adding arrowroot powder or chia seeds for thickening)

- Mash the fruit with a potato masher once the fruit begins to soften. If foam forms on top of the fruit you can skim with a metal spoon and discard if desired.
- Prepare Sterile Jars: Meanwhile fill the canning pot ¾ full with water, cover, and bring to a boil over high heat. If you don't have your jars sterilizing in a hot dishwasher you can use this pot of water to sterilize them. Also start a small pot of boiling water to sterilize the lids separately. Be sure to wash all jar pieces in hot soapy water first.
- Once the water is boiling turn off the heat. Test the temperature with your thermometer and when it reaches 180 degrees F put the jars and bands in the large pot and the lids in the small pot. Leave everything in the hot water until ready for use, removing one at a time as needed.
- When the jam is done cooking do a taste test to make sure the thickness and flavor is to your liking. Hint from Ashley: Drop dots of jam on a cold plate, if it seems to set up, it is done. You can also see if it coats the back of a spoon.
- Remove the first jar from the hot water using your jar lifter tool and shake out excess water. Don't touch inside of the jar in order to keep it sterilized. Insert clean canning funnel and ladle the hot jam into the hot jar leaving ¼ inch headspace at the top (this is where the headspace tool can come in handy - leaving more space at the top might not give as good of a seal). If there are any air bubbles you can slide a clean knife along the inside of the jar to remove them. Using a clean rag wipe excess off the outside of the jar and rim.

- Using a magnetic lid lifter pull the first lid out of the hot water and set on top of the jar without touching the bottom of it. Then while only touching the outside of the band screw it onto the jar just firmly enough so it doesn't feel wobbly on the grooves. Repeat until all jars are filled.

- Note (If you don’t want to actually “can” the jam): You could stop here and refrigerate jam for 3 – 4 weeks. To freeze the jam make sure you used freezer-safe jars, (Ball makes plastic jars for this purpose), leave at least a half an inch of space for expansion, allow the jam to completely cool, and put in freezer for up to one year. One additional tip for freezer jam is by placing a round of parchment paper on top of the jam, you can prevent ice crystals from forming.
- Process the Jars:Bring large pot of water back to a boil. Using your jar lifter (or canning rack) carefully lower as many jars that will fit without overcrowding into the boiling water so they are covered by at least 1 - 2 inches of water. It is recommended that the jars do not directly touch the bottom of the pot (so hot water can flow beneath them) and some even suggest putting a dish towel on the bottom to create space. From the moment the water is boiling and the entire first batch of jars are submerged set the timer and process them for 10 minutes.

- When 10 minutes is over use the jar lifter to carefully remove the jars from the water. Put them on the counter and don't move them right away. You will hear your jar lids "popping" which means they have been sealed properly. If jars aren't sealed within 12 hours then move them to the fridge and eat within 3 - 4 weeks.
- Remove bands from sealed jars and with a clean, wet cloth wipe off any jam that has congealed on the outside rim of the jar. This prevents mold from forming on the band. The band can be reapplied, but don’t screw them on too tightly.
- Label jar and store in a cool, dry, dark place for up to 1 year.


Notes
- You can optionally add in arrowroot powder or chia seeds as a way to thicken the jam. If you like jams with crunch, opt for the chia seed addition!
- We recommend organic ingredients when feasible.


Nikki Mahler says
I did not read ALL of the comments, so forgive me if I am repeating....but....I have made this recipe twice now. The first time I used agave (not nearly what the recipe called for in honey) and this time I made it again and used maple syrup (maybe 1/4 cup). Both times it has come out DELICIOUS!!! I am thinking I won't ever need to add 3 cups of honey!?!? The only reason I didn't use it was because we didn't have it either time! Has anyone else made it without any sweetener? I am now a jam addict!
Rebecca Geysbeek says
Have you tried raspberries with this recipe?
Assistant to 100 Days (Jill) says
I have not. Let us know how it turns out if you decide to give it a try. Jill
Zoe says
My jam is not setting, it's been slow boiling for 3 hours! How can I get it to set?
lilmrsmchenry says
If you are feeling adventurous, you can make your own pectin at home instead of using the processed commercial stuff you find in stores. It will allow you to not cook your fruit to death and preserve a lot of the nutrients. You just need tart apples (if you can get unripe they are the best, if not granny smiths do in a pinch) and fresh lemons. This is how our great grandmothers used to do it before it was widely available in stores.
http://preservedandpickled.blogspot.com/2011/07/homemade-pectin.html
Also, for people who say theirs is runny. I normally throw a bunch of spoons in my freezer so they will be nice and cold before I start. When I think it might be ready, I quickly dip a frozen spoon in my pot so that it cools and I can check it really fast.
Doctor says
Thanks for the useful and helpful post. There was one misstatement that I found a little alarming, though, in terms of food safety. Your nose will NOT reliably tell you if a canned food is safe. Botulism, for example, does not produce differences in taste, and and ingesting even a tiny bit can make you seriously ill (http://www.ncbi.nlm.nih.gov/pubmedhealth/PMH0001624/).
lovebar says
I agree, that is a very dangerous statement and should be taken out. Canning can be deadly. If you are altering tested recipes by changing the sugar content be sure to hot water can to kill any remaining bacteria. And don't try the low acid recipes unless you've used a pressure canner to process them.
100 Days of Real Food says
I actually said "your nose and/or a quick taste test should confirm whether a jar spoiled" ...which is true and says nothing about it being "safe" because you are right you cannot detect botulism, which is a rare but can be a reality in some cases.
Sally says
Freezer jam requires much less sugar. I use Ball RealFruit Pectin no-cook freezer jam instant pectin; white 4.7oz container w/ a green lid. Love it. Easy and tasty.
Rachal says
I've made lots of jam. However, this was my first time making jam without pectin. I found that there was way too much honey for my taste. I cooked it for 45 minutes, which overcooked the jam. I think 20 minutes would have sufficed.
It didn't not jell, but was very runny. I'm not sure if it was because there was not enough pectin in the apples I used or if it was because the pectin was overcooked. I want to do more research and do more testing.
One a different note, it is not necessary to hot water bath the jars of jam. If hot jam is put into warm jars with warm lids, they will seal. I've rarely had a jar not seal.
Assistant to 100 Days (Jill) says
Hi Rachal. Thanks for leaving your review of the recipe...our team is sorry it did not work out well for you. Thanks for the tip as well. Jill
Rachal says
Here is a recipe I devised that actually did work and tasted good, without being overly sweet.
4 cups crushed strawberries
3+ cups sugar, to taste
2 shredded granny smiths
2 Tbl lemon juice or half of a medium lemon
Cook a total of 20 minutes, last 5 minutes were a rolling boil.
Temperature was 100ish Celcius.
Makes 6 half-pints or 3 pints.
Amber says
I was just curious if pectin was a no-no ingredient with the rules. I found an organic fruit spread at Trader Joe's that has organic strawberries or raspberries, organic grape fruit juice concentrate, fruit pectin and vitamin C as the only ingredients. As much as I would love to make my own I just don't have time.
100 Days of Real Food says
I don't think I've ever seen a store-bought jelly that doesn't contain pectin so I don't think you'll find one. Pectin is just a natural additive that helps the jam to "gel" so I think it's fine as far as additives go.
:) says
I just wanted to give a quick reccomendation I'm sure you already get plenty. If you do pursue more canning defenitly get an All American Pressure Canner. It is pretty pricey but completely WORTH IT! We have 2 never had any issues with it or canned goods processed in it.
Your jam recipe is amazing and good luck with future canning! It's a dying art.
Kristy Kelley says
How many jars does this recipe make or are required? I read the post a few times but I don't see where it mentions how many jars I will need. Thanks so much! I'm excited to attempt this!
Mike says
I made a 1/2 batch using 3lbs of strawberries and it made exactly 5 jars.
100 Days of Real Food says
The yield is just below the title of the recipe: 6 pints
Mike says
I did my first 1/2 batch this past weekend but haven't actually tasted it yet. I wanted to finish what I've got in the fridge already. It took me quite a bit longer than expected but mostly just waiting for the jam to cook. My question is what is the difference between processing the jars and just freezing them. The directions say they both keep for a year. I would guess if you're giving them to people you'd want them canned. However for personal use keeping them in the freezer may work just fine. Any input is appreciated. Thanks for all your work!!
Mike says
Finally got a chance to try it this morning on some toast. It was delicious!!
100 Days of Real Food says
The end result will be the same it's just a matter of how you want to store the jam until it's time to dig in.
DeAnn Parsons says
I prefer to can vs freezing. If you have a power outage you could lose everything in your freezer! Of course I can my garden veggies and am starting on canning things like chili, soups, etc. (using pressure canner) I would like to get a nice supply of foods in my pantry. I have been reading up on folks not only having a minimum of 6 month savings in the bank, but to have a 3 to 6 month saving of food in your pantry. If job loss, sickness, etc happened...you would be well stocked and not have the worry of food...and you would know where your food came from!
heidi says
Thanks for the great recipe. Exactly what we were looking for. Turned out great!
Katie @ Katie Without Restrictions says
I'm with you! Brand new to canning, but feeling pretty gung-ho about it ;) I don't intend to do anything outside the box, or low acid, until I'm very comfortable!
Alexis says
I made this jam over the weekend. It was my first attempt at canning, but I got nervous and put it in the freezer instead. Next time, I will process it! I cooked the jam for a little over an hour, and was still worried it would be syrupy. I tried some the next day from a jar I stored in the fridge - delicious! It was not as firm as store-bought, but so good. Thanks for inspiration!
Heather says
I have made the recipe a couple of times now, and I found that if you stirred it more frequently it thickens better. Make sure to keep mixing the thicker stuff from the bottom.
Jennifer says
You asked for some tips from us who have canned before and I will share a couple that I learned from my Uncle who has canned for years.
I have used the dishwasher to keep my jars warm, but you can also keep your jars hot by putting them in the oven on a cookie sheet, I usually put the oven at 200 degrees.
Also, if you don't have the canning basket to put at the bottom of the pot, you can put an old rag in the pot and set the jars on the rag. It can be tricky as it sometimes swirls around in the boiling water but with some practice, it will work. I do it to help keep the jars from moving around and clanking into one another. One day I will invest in the bigger pot but until I have a little more money, this works!
As for pickles, my Uncle gave me the best advice for crisp pickles and it seems to work. Keep them on ice or in ice water until you put them in the jars for processing. He prefers you pick them and put them in a tub with ice and water and then into the refridgerator without much time inbetween picking and cooling. When you're ready to process the cucumbers, take them out of the refridgerator but leave them in the ice bath. I know it's unrealistic for everyone to grow their own so just try to get as fresh as possible and get them on ice as soon as possible or see if you can find a U-pick.
That's all for now!
Assistant to 100 Days (Jill) says
Hi Jennifer. Thanks for taking the time to share your knowledge with the rest of our readers.
Amy Keltner says
If I am going to freeze my jam instead of "canning" it, do I need to go through the whole sterilization process or can I just run my jars through the dishwasher and call it good?
100 Days of Real Food says
No need to sterilize the jars if you are going to be freezing the jam.
Kerri Mayo says
I just bought maybe half a bushel of peaches from a road side stand and was wondering if I could use this same method with peaches. Or would I need to do something special with the peaches? I really like the idea of not having to add pectin to the jam!
100 Days of Real Food says
Kerri - I think I am too new to canning jam to give you a solid answer on that one...here is another recipe for peaches in case you need it though! https://www.100daysofrealfood.com/2010/08/23/recipe-homemade-peach-sorbet/
Liz says
I tried this recipe about a month ago with blueberries that my husband and I picked. I have never tried canning before but this worked beautifully. I bought a half bushel of peaches at the farmers market yesterday. I looked around online and could not find a satisfactory recipe elsewhere so I decided to give this a whirl with the peaches. I blanched and peeled them first then followed the above recipe except that I reduced the honey to about 3 1/4 cups. I also added 1 tsp of cinnamon and 3/4 tsp ground ginger. It turned out beautifully!
With my first attempt I didn't purchase any special tools - just improvised with stuff on hand. This time I noticed a Ball canning set at the grocery for under $10. The jar lifter and lid lifter made the process much easier.
Thanks, Lisa for such a great recipe! I am totally hooked on canning :)
Carlye Rankin says
Just finished the first batch of this strawberry jam. I used 24 oz of honey instead of the full 3 and 3/4 cups. I also didn't have a potato masher so I used my Ninja Blender to make it nice and smooth. Can't wait to try this out! Thanks for the recipe!
Jessica says
I know it's been nearly a year since you posted this, but did your jam turn out OK? I would like to try reducing the honey in the recipe. Raw honey is expensive!
Erin says
Lisa, how many jars do you need for this recipe?
Assistant to 100 Days (Jill) says
Hi Erin. The recipe yields 6 pints, so, it will depend on the size of your jars.
Susan Bewley says
I have always wanted to learn how to can but have always been a bit intimidated. Is this a good starter recipe? Thinking of picking up the book you recommended as well. I love jam and we use those type of jars as extra cups in our household.
Budget Earth -
How to Save Money on Natural Food
Assistant to 100 Days (Jill) says
Hi Susan. This was Lisa's first go at it too, so, I would say it would be a good place to start. Good luck.
Michele says
Has anyone tried using Agave, if so, do the measurements change? We make freezer jam several times a year, i would love to try this using Agave Honey.
Heather says
I used agave. I did use the same amount as the honey. It turned out really well, but I also added a vanilla bean. It was REALLY good! You can find my modifications here http://www.homemademadesimple.blogspot.com/2012/06/strawberry-jam.html.
Holly says
Hi
I've been boiling for an hour...still not nearly thickened. Any thoughts?
Thanks
Emily says
same issue...did you figure it out?
100 Days of Real Food says
Holly - I may be too late with this response...did it turn out okay? Did you chill a bite of the jam to see if it would thicken?
Kristen says
I just want to say, it is a bit misleading to call this "no sugar" jam since honey absolutely is sugar (it is made up of fructose and glucose just like table sugar), just a much less processed sugar. I know you know this, I've read your posts on sweeteners, I'm not trying to be snarky at all just felt it necessary to point this out since I'm reading a couple of comments (like the one above) extolling the virtues of this recipe having "no sugar." Since most jam recipes I've seen call for 4 cups of sugar and this recipe calls for 3 & 1/2 cups of honey and given the fact that honey is 22 calories/tsp vs. 16 calories/tsp for table sugar (thus denser), I'd say this is neck in neck in sugar content with all the other sugared jam recipes out there. Maybe it should instead say, "without refined cane sugar or pectin"
100 Days of Real Food says
Kristen - You are right. And for exactly the reasons you stated I first only called this Jam "Without Pectin" and later added "Without Sugar" to the title mainly because so many people responded by saying they'd been looking for a jam recipes without (refined) sugar, and I wanted people to be able to easily find this post if that's what they were searching for. Based on your feedback though I've added (refined) to the title just so we are all on the same page. Thanks for taking the time to share that suggestion with me!
Casey says
A jam recipe with no sugar and no pectin!! Yay! And found on one of my newest favorite websites. :) I just bought the box of pectin with the calcium water powder and I was going to try that to make freezer jam, I still will try it, then next I'm trying this!! Been looking for a while for a recipe like this and you post it here for me. thanks!
Sarah says
Please don't hear this as a snarky comment because it is anything but! I am jut wondering why we need so much sugar or honey or whatever to sweeten ripe in-season fruit preserves? Does the sugar act as a preservative? I have tried to do a bit of research but I haven't found a good explanation. Why not make some homemade green apple pectin and boil up some fresh strawberries, add a little honey to sweeten the pot and call it good? There much be a good reason.... I just haven't found it.
100 Days of Real Food says
Sarah - I am so new to canning I am not ready to start modifying recipes quite yet especially since I've learned that each ingredient can play an important role...and yes, like you said the sweetener can act as a preservative.
Sharon says
Do you peel the apples or leave the peel on?
100 Days of Real Food says
Good question...leave the peel on.
Maryse says
I think it would be helpful to revise the recipe and state unpeeled grate apples in the directions. I just finished making a batch and peeled my apples since I didn't read all the comments first. I think it still might be successful though as I cooked the mixture for a little over an hour and it seemed nice and thick.
100 Days of Real Food says
I will revise it right now...thanks for the suggestion!
Alex says
I'm so happy to see this post! I've been doing a lot of research on canning over the past year, and it's something I'm really excited to begin this summer.
Melissa@Mom's Plans says
I tried this recipe with just 1 lb of strawberries and 5/8 cup of honey to see if we liked it before I invested the time for canning and buying organic strawberries. We loved the result, but it was a bit too sweet for us. Could you cut back on the honey without affecting the final result?
100 Days of Real Food says
You know I feel too new to canning to give you a definitive yes! I know every ingredient plays an important role and that the sweetener can act as a preservative.
Claire says
I started making strawberry jam a couple years ago when I bought a flat of strawberries during the Louisiana Strawberry Festival. It was easy to do and worked beautifully from the first try. This past week I completed 3 batches and we no now have 18 jars of yummy jam just waiting to be devoured! My recipe calls for 3 lbs of strawberries (I use 5 pint containers), 4 lbs of sugar, and 1/3 cup of lemon juice. (In my defense, I didn't discover "real food" until this last year, so my sugar recipe was the one I used!) I only wanted to make one comment about your reusable labels. Since you have to throw away the lid each time anyway, I just write directly on the lid after the cans have cooled. 'Strawberry 2012' is turning out to be a good batch. :)
Kristen says
Well I'm new to this canning business myself but I have been doing quite a bit of research in preparation for my first batch.
As to the comments regarding no sugar, no pectin jams/jellies - best I can tell, it is not possible. If you don't want to use pectin, you definitely need sugar (even Lisa's recipe uses quite a bit of sugar, 3 & 1/2 cups of honey is no small amount) and if you don't want to use sugar..you definitely need pectin. Probably a no-sugar pectin like Pamona's (which is a citrus derived pectin with monocalcium phosphate, not very real food-wise) - these pectins react with the calcium phosphate instead of sugar to give you the nice jam "set." Other pectins are fruit derived but the whole idea of pectin is that it reacts with the sugar and fruit acid to achieve the final set. Plus sugar in jam (like previously mentioned) is necessary to keep the nasty bacteria out. Jam is not a health food, it is a treat. But homemade jam is a way for us to control what is in it, make good use of an abundance of fresh berries and fruit and save money on store bought varieties. If you want a no sugar "jam", just smash up some berries with a mortar and pestle and spread it on your sandwich (it is quite good, if a bit messy).
But you can make your own pectin, easily! People have been making jams for a long time, long before powdered pectin. Some of our grandmas and great grandmas knew how to make their own pectin (and some just boiled the jam till it was thick and unfortunately devoid of most of its nutrition).
So here is a great link to making your own, (great site too)
http://www.mynewoldschool.com/2010/07/27/make-your-own-pectin/
All that is needed is some green apples (crab apples apparently work very well, so if you have one of those around - bango! Free pectin!), like Granny Smith and some water. I've seen some recipes that recommend adding 2 tablespoons of lemon juice too. The link above also gives a recommended amount to use and the way to test the pectin content in your homemade pectin (all you need is a bit of rubbing alcohol).
It doesn't get any more real than that! Happy Canning!
Joy says
From what I understand (canned growing up with my mom and for the past few years on my own as an adult,) that is the purpose of the apple and the longer cooking time in this recipe. Apple contains natural pectin and usually you just heat the berries until they simmer and cook for about 20 minutes. This recipe cooks them over double which also reduces/thickens the mix. Hope this helps! :)
Francie T says
I have failed using this recipe! Ack! I just ruined $20 worth of strawberries and about 2 hours of my time sterilizing, slicing, measuring...not sure what went wrong as I followed the recipe exactly. After 30 minutes of cooking my strawberry pot looks like ugly soup and not yummy jam. I might have to go back to using pectin.
100 Days of Real Food says
Francie - Did you try testing in on a cold plate like suggested? The jam "gels" once it's cooled. Also the longer you cook it the thicker it will become.
Francie T says
I did try the plate and I cooked it for a full 10 minutes longer, but it was still very runny. I went ahead and "put it up". I may have made 6 pints of Strawberry Syrup! That's ok too. It was my first time cooking jam and canning, so overall I think I did fine. I may research some options for decent powdered pectin or look into whether I can put the freezer jam recipe into the jars and water bath....maybe if I add the acid that would work.
100 Days of Real Food says
I am sorry to hear it was still syrupy...thanks for your feedback. I changed the recipe to say it could need up to 60 minutes in case it takes longer to thicken for some. I am wondering if excess water from washing the berries could have had an impact. I bet your berry syrup would be great over pancakes :) I am glad you didn't throw it out.
Melissa@Mom's Plans says
This recipe is the first one I am going to try this year. Organic strawberries are coming in season for us next week, and I can't wait to start! Will you be sharing other canning recipes?
100 Days of Real Food says
Yes, I plan on sharing other recipes once tomatoes come into season!
Debbie says
Thank you for the recipe. We started making jam this year. My 12 year old wants to take jam to the fair and the farmers market. I am happy to have a recipe with honey and not sugar.
Susan M. says
We've been using Pomona's Universal Pectin, which uses a calcium water to activate and allows you to reduce or eliminate sugar. We've not had any setting issues and I feel pretty good about the contents. http://www.pomonapectin.com/
Aimee says
A quick note: You wrote "proper canning jars...which does not include old washed out Ragu spaghetti sauce jars". I haven't run across any Ragu jars lately, but I do collect and use spaghetti sauce jars that are labeled "Mason". My friends collect them for me, it's better than recycling the glass! Classico Spaghetti is in 22-oz Atlas Mason jars, which is a bit large for jam but wonderful for applesauce, pie filling, and many vegetables. As long as the top glass edge is smooth and the lids and bands fit - and it says "Mason" on it - you should be able to use the jars.
100 Days of Real Food says
Good to know...I am still learning!
Deon says
The Classico website says you should not reuse the jars for canning, as they have a plastic coating on them that may scratch, and make the jars more likely to break. I believe it also stated that their jars are made of lighter glass. I too was hoping to reuse their jars for canning, but instead now reuse them to store dry/bulk items in.
Deb says
I was just thinking this morning that I need to make some jam!
Rachel (De Ma Cuisine) says
I've been on the lookout for jam recipes with less sugar, or that use honey. Thanks for sharing! I can't wait to try this!
rhyann says
I just did my strawberry jelly 2 weeks ago! Darn! I wish I had this recipe before I did it! I did freezer jam and used the low sugar pectin - cutting out as much sugar as possible.
I guess when the blueberries and blackberries come in I'll be picking those and turning them into jam using your recipe!
Patty says
So great to see you here. Thank you for sharing. I am a new person to canning, and actually have just been able to read about "how to" and not been able to afford to purchase my tools. To my surprise I received everything from my son and my daughter in law for mothers day this week! To my delight you are here, a beginner, sharing your experience and healthy recipes. Thank you for your aid to my new journey!
Penny T. says
Netta, you do not have to use glass jars if you are making freezer jam. I've only made freezer jam but I'm considering trying to can some strawberry jam this year. I love the ingredients used in this recipe and the great instructions. I remember my Mom canning some things when I was a child and she, also, used the hot wax method.
Netta says
Thanks Penny....we already have lots of freezer containers in various sizes and since going "REAL", we have been making darn good use of them. I'm too chicken to can things yet, so we are freezing and drying everything....with a few fridge pickle recipes thrown in here and there. Can't wait to try making freezer jam!