This is such a fun way to spend time with the family on the weekends or if your kids have friends over. I show you exactly what you need to do if you want to have a Make Your Own Pizza Night at your house with my Homemade Whole-wheat Pizza recipe—it's sure to be a crowd-pleaser!
Want to Save this Recipe?
Enter your email below & we'll send it straight to your inbox. Plus you'll get great new recipes from us every week!
I got this recipe from a friend of a friend and it turned out great! Making the dough ourselves took a little extra time, but my daughters loved helping me and once it was done everyone scarfed it down (including me).
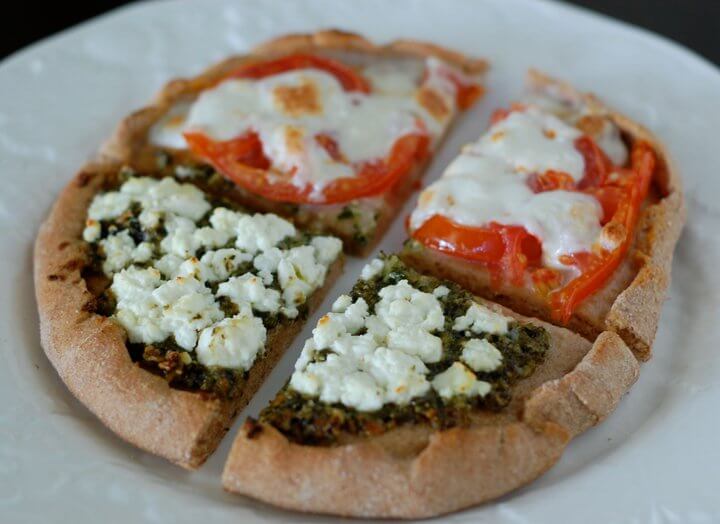
Whole-Wheat Pizza with Pesto/Goat Cheese and Tomatoes/Mozzarella

Homemade Whole-Wheat Pizza
This is such a fun way to spend time with the family on the weekends or if your kids have friends over. I show you exactly what you need to do if you want to have a Make Your Own Pizza Night at your house with my Homemade Whole-wheat Pizza recipe—it's sure to be a crowd-pleaser!
Print Recipe
Servings: 4 people
Ingredients
- 1 cup water (warmed)
- 2 teaspoon active dry yeast
- 2 teaspoon salt
- 2 tablespoon olive oil
- 3 cups whole-wheat flour
- tomato sauce
- mozzarella cheese (grated)
- oil spray
Topping Ideas
- sausage
- mushrooms
- mixed veggies
- parmesan cheese
- pesto
- goat cheese
- arugula
- olives
Instructions
- Drop the yeast into the 1-cup of warm water and let it go to work for a few minutes. It should foam up a little bit. Stir the salt and olive oil into the yeast mixture.
- Pour the flour and yeast mixture into a food processor with a dough blade or into a mixer with a dough hook and turn on the machine. (You can also mix up this dough by hand.)
- You should end up with a ball chasing itself around the food processor. If the dough is too dry add warm water a teaspoon at a time and if it is too wet add flour 1 teaspoon at a time.
- Remove the ball from your food processor and knead into a smooth ball. Put the dough into a large ziplock bag or bowl covered with plastic wrap (put a touch of olive oil in and coat the inside of the bag/bowl first) then leave it in fridge for as little as 1 hour or overnight depending on how much time you have. It will rise on its own in the fridge.
- When ready to make the pizza preheat the oven to 500 degrees F. Use a rolling pin to roll it out into the desired shape (don't make it too thin!). Put the flat pizza dough on a baking sheet that has been sprayed with cooking oil. Top the dough with homemade or organic tomato sauce, cheese and other toppings of your choice. Bake in an oven for about 8 - 10 min. or until crust and cheese are golden brown.
Enjoy!
Notes
We recommend organic ingredients when feasible.
Vegetarian if meat toppings are omitted.
Vegetarian if meat toppings are omitted.
Nutrition Facts
Nutrition Facts
Homemade Whole-Wheat Pizza
Amount Per Serving
Calories 368
Calories from Fat 81
% Daily Value*
Fat 9g14%
Saturated Fat 1g6%
Sodium 1167mg51%
Potassium 118mg3%
Carbohydrates 64g21%
Fiber 10g42%
Protein 13g26%
Calcium 60mg6%
Iron 2.1mg12%
* Percent Daily Values are based on a 2000 calorie diet.
Want weekly REAL FOOD meal plans made for you?→ Check It Out


Noe Scanlan says
hello there and thank you for your information ? I've certainly picked up anything new from proper here. I did alternatively expertise several technical points the usage of this website, as I skilled to reload the site many times previous to I may just get it to load correctly. I were puzzling over if your web host is OK? Not that I'm complaining, however sluggish loading cases times will often impact your placement in google and could damage your high-quality score if ads and marketing with Adwords. Well I'm including this RSS to my email and can glance out for much extra of your respective intriguing content. Make sure you update this once more soon..
Jaci says
Made this tonight and it was DELICIOUS! ugly and a but thick so it took longer to cook and the oven in our rental cant be over about 250 but it was still delicious!
used tiny balls of mozzerella since the shredding is impossible
Jaci says
how do you grated mozzerlla?! All i end up with is a mushy creamy mess! we stopped buying pre-grated cheese of course and i tried freezing ti first and i tried doing it in my food processor with my grating blade in...just in case it was my or my body heat messing it up but i still just end up with a creamy mess....last time we made pizza i just pulled 1000s of strings off but it wasnt fun and it still wasnt enough cheese! any ideas?
Lisa says
Mozzarella is a really soft cheese so slices would work as well if grating is too difficult.
Alicia says
I cut mine into small cubes and that seems to work well.
Michelle says
I'm still on the search for a great whole wheat pizza dough recipe. This just didn't go over well at home,. I may give up and just submit to ordering out for good pizza -at least there's ONE pizza joint nearby that uses fresh/organic, real ingredients with a whole wheat crust option... it's just kind of pricey. Love all your other recipes, though!!!
Michelle says
I make this all of the time, I use 8" non-stick round cake pans and it makes the pizzas perfectly round and you don't need to roll the dough out, just press it into the pan and when it is done cooking use a spatula on one edge and the pizza pops right out of the pan.
Michelle says
I forgot to mention that it makes 4 individual pizzas.
Stephanie says
Cauliflower Pizza
3/4 cup cooked, riced cauliflower, 1/4 cup parmesan cheese, 1 egg, 1 cup mozzarella cheese, 1/2 tsp fennel, 1 tsp oregano, 2 tsp parsley. Combined together the first 4 ingredients. Spray a pan with pam or use olive oil. Press evenly on the pan. Sprinkle evenly with fennel, oregano and parsley. Bake at 450 degrees for 12-15 minutes. After removing from oven run a spatula under the crust to make sure it isn't sticking. Top with sauce and toppings you desire. Place back in oven at 450 till cheese s melted. Or you could place under the broiler for a few minutes until the cheese is melted. And enjoy. Tip: To make riced cauliflower you just grate a half a head of cauliflower with a cheese grater. And place in a microwave safe bowl (do not add water) and microwave for 6-8 minutes depending on your microwave. Then place in a cheesecloth and squeeze to remove the water (or your pizza will be soggy).
Stephanie says
That looks great. But have you ever tried cauliflower crust pizza. me and my boyfriend had it last night and it was great, can't even taste the cauliflower.
Assistant to 100 Days (Jill) says
I have not. Please share the recipe if you like. Jill
brandis says
if i were to make 4 small pizzas from this recipe, should i prepare the pizza, toppings and all freeze and the bake. or should it be baked then frozen then reheated.?
100 Days of Real Food says
I would bake then freeze the finished pizzas.
Michelle says
We are gluten sensitive at our house. What other flours can be used instead of wheat?
100 Days of Real Food says
I would recommend checking out Deliciously Organic's blog for some gluten-free pizza crust...anytime you start changing major ingredients you never know what you are going to get!
larissa says
Kimmy - I make this in the bread machine - just use your regular 'dough' setting and it will turn out great. I usually do exactly what she says at the top of the recipe, only i do it in the bread machine - after the yeast/water sit about 10 mins, i add the oil, salt and flour and turn the machine on.
i actually have a loaf in there right now. I'm using fresh ground flour though, and it's taking longer to rise.
Kimmy Ho says
Hi there,
I am excited to try out this recipe the next time we have homemade pizza, which will be this weekend! I usually make the dough in my bread machine and then bake it with toppings accordingly. DO you know or have you ever tried to make this recipe for dough in the bread machine? Just wondering!! Thanks! I love your blog!!
100 Days of Real Food says
I have not done it in the bread machine myself, but I think it would work! :)
Heather says
This is excellent! I made it along with the white pizza crust we usually make, and really enjoyed it. Even my husband said it was "pretty good"....next time I'll only be making the whole wheat crust. I did end up with 8 mini pizza shells, which are the perfect size for me.
The only change I made was to add a pizza seasoning spice mix (garlic, chilis etc) to the water/yeast before adding the flour, and I did it all by hand. It turned out wonderfully!
Angie says
First, I wanted to thank you for this awesome site! I'm having a field day trying the recipes and so far have had great success except for the pizza. I followed the directions to a T and the crust came out "doughy." I even threw it back in the oven to cook longer but it still tasted like bread rather than crust. Can you give me any tips on what I may have done wrong?
Thanks!!
100 Days of Real Food says
So glad you are enjoying the site. Did you follow the pizza crust directions exactly as listed and were all your ingredients fresh (whole-wheat flour has to be kept in fridge or freezer)? Also, how thin did you roll it out or was it fairly thick?
Angie says
All the ingredients were fresh but I messed up by not rolling it out enough so it was too thick. I tried it again and made 2 8" pizza crusts, baked them for 5 minutes, then removed them, made one straight mozzerella and one veggie pizza, baked an additional 5 minutes to melt the cheese, and they both turned out great. Thank you!!
carissa says
I actually baked my crust first as well then topped it and baked it again and it turned out pretty good. It was hard to roll out but i may have let it sit in the fridge for too long. This is my first attempt at making bread of any sort. I'm going to keep trying though :)
100 Days of Real Food says
I think it's easier to roll out if the dough isn't cold...if it can be brought to room temp first. It can also rise at room temperature if it's only for a couple hours.
Sarah says
When you preheat your oven, put your stone/baking sheet in the oven to heat up with the oven. Put the pizza on top of the already hot baking sheet. This will make the crust cook through without having to bake twice!
Laura says
LOVE the pizza crust! We actually get two pizza crusts out of this recipe because we do like it thin and crispy. I sent my daughter with pizza (cheese, sauce and pizza pieces) for lunch twice this week. It feels great to make homemade pizza and I love being able to make it rather quickly!
stephanie says
my one year old reaches for fruits and vegetables so this mama is glad
Amy @ A Little Nosh says
We made this tonight and it was great! My son LOVED rolling it out and putting the sauce and cheese on his and then he completely gobbled his up. I'll be posting about this recipe tomorrow!
stephanie says
I made this today and both me and my one year old loved it!
Allison says
I have almost this exact recipe and it's called the "no rise pizza crust". I'm anxious to try it with all whole wheat flour.
emily says
I just wanted to say that we have made this pizza dough probably a million times and LOVE it. We usually do it once per week because my kids will just devour it! We love your webiste :) Thank you!
Tricia says
Is there a way to find out the nutritional information on this and other recipes? My husband is a diabetic. He is trying to follow what the Dr. recommended for him, but it's a little difficult if I don't have this information. Thanks!
100 Days of Real Food says
No I don't track specific nutrients or calories. I explain it a little in this post (although I don't have a medical condition like diabeties): https://www.100daysofrealfood.com/2011/10/17/nutrients-in-refined-vs-whole-grains/
Stefanie says
Amazing! We made this for dinner tonight and it was so delicious! (I'm not a huge homemade pizza fan, but my husband loves it so I figured I would give it a try and I really really liked this recipe!) We used mozzarella and a couple slices of bacon from the farmer's market and cooked it on the grill -- we couldn't get enough -- and there are still 2 slices left! Going to share this recipe with all my friends! Thank You!
Amanda says
This crust was delicious! I topped it with spinach(sauteed with fresh garlic/olive oil first) mushrooms, broccoli, turkey pepperoni and cheese. I made the dough the night before and left it in the fridge, it made for a quick healthy dinner. My husband even liked it.
Margie says
Loved it, came out perfect! Thanks for sharing. :)
Melissa says
Fabulous, fabulous, fabulous! Thanks so much for sharing this. Made it last night for dinner, and my family loved it.
Jill Robinson says
Oh my gosh!!! This is so delish. I made this tonight using a fresh mozz. ball and mushrooms. My 16month and 6yr old couldn't get enough of it. Yum-o!!
Dee Dee says
Yes they were. boo. maybe I did something wrong! Oh well, definitely going to try again.
Dee Dee says
tried the recipe tonight... my crust crumbled and fell apart after baking, any tips to help me fix this next time?
100 Days of Real Food says
Are you sure all of your ingredients were fresh...the flour (which by the way whole-wheat flour spoils in the pantry...must be in freezer or fridge), the yeast, etc.?
Kirk says
I cant wait to try this, we have tried it using some already baked dough or purchased dough and honestly was not that great.
Tara says
At the above problem of the dough not rising...you could have old yeast...it goes bad and will not rise after a while. Hope this helps:-)
Jamie says
I've tried this recipe a few times. I can't seem to get my dough to RISE. I've never made pizza dough before and have never used yeast. I'm using my kitchen aid mixer to knead the dough. I've enjoyed lots of your other recipes, this one looks so yummy, but I must doing something wrong. Any suggestions would be helpful. Thanks.
Lisa N says
hi. Thanks a bunch for this recipe. I'm looking forward to trying this one and many of your others. Can you freeze the dough or do you have to bake it first? THANKS!
100 Days of Real Food says
I've heard of others freezing the raw dough, although I've only personally tried freezing it after the plain dough has been baked (which works!)
Lisa B says
Has anyone had success grilling pizzas with this dough? I'm all about not heating my kitchen up in the summer and have recently fallen in love with grilled pizzas. Thanks!
100 Days of Real Food says
Yes, I have! Check it out: https://www.100daysofrealfood.com/2011/04/28/giveaway-pizza-stone-50-value/
Sara says
I made this and mixed the dough by hand - it was still easy and turned out beautifully! I doubled the recipe and made some homemade frozen pizza, too. I followed all the instructions like I was making a regular pizza, but instead of putting it in the oven after adding the toppings, I froze it on a cookie sheet for about 30 minutes, then wrapped it & put it back in the freezer. Two weeks later, we baked it at the temperature noted in the recipe, just increasing the cooking time by 5 minutes or so. It was awesome! :)
100 Days of Real Food says
So glad to know it worked when you froze the raw dough...I've only done it after it was baked (without toppings). Thanks for letting me know!
Genny says
I have made your pizza dough lots of times now and LOVE it! I especially love the "put it in a bag and throw it in the fridge" trick! So simple! :)
In my blog reading, I came across a similar pizza dough recipe that uses pureed sweet potato. It makes the crust a little sweeter and of course, squeezes in some extra veggies--always a plus in my book! It doesn't seem like the blog is online anymore, but here's the link just in case it comes back up: http://www.soundeats.com/2010/05/11/sweet-potato-pizza-pie/ I usually bake lots of sweet potatoes one night for dinner and then save the extras for the dough recipe later in the week!
Here's the recipe:
Sweet Potato Pizza Crust
(for two pizzas crusts)
3.5 cups whole wheat flour
1 packet yeast
1 cup hot water
1 cup sweet potato puree
1 teaspoon sea salt
1 Tablespoon extra virgin olive oil
Sprinkle the yeast over the hot water and let it bloom (it’ll look slightly foamy on top). Add the whole wheat flour, sweet potato puree, sea salt and olive oil and combine. If you have a Kitchen Aid mixer, you can use your dough hook and knead it for five to ten minutes. If not, knead by hand. Place the dough in a bowl, cover with a dish cloth, and let rise for an hour or so. Divide the dough in half and enjoy! The dough also freezes well, too.
My Notes: I always have to add extra flour while it's kneading in the Kitchenaid, so have some ready just in case. I make the recipe with freshly ground soft white wheat flour. The dough is super sticky when it's finished--I guess because of the sweet potato; I thought I'd done something wrong the first few times but I think it's just the nature of this dough. I also let it rise in a bag in the fridge like you suggest and it does great! I've made lots of various toppings recipes on this dough, but I have to say I think less is more; my favorite so far has been olive oil and mashed garlic massaged into the crust, with fresh tomato slices, fresh basil, and goat cheese spaced out on top. When it's done, it's really good with a drizzle of honey like suggested in the soundeats blog! Hope you like it! :)
Leigh says
Is this just one pizza crust? I feel like I have a lot of dough to work with!
100 Days of Real Food says
I either make one big rectangular pizza (the exact size of a standard cookie sheet) or 4 small round ones that are equal size. I hope that helps!
Leigh says
Thanks! I made one big crust before I read your reply. It was a little thick for us, so I will definitely try making smaller crusts next time. Thanks for inspiring me to finally try this.
GourmetOnADiet says
How many mini pizzas does this make, or one pizza for how many people? Thinking about doing this for my boy's first birthday Monday!
100 Days of Real Food says
It makes one big rectangular-shaped (cookie sheet size) pizza or 4 small round ones. I am making this recipe for my daughter's birthday party this weekend as well!!
Cristina @ An Organic Wife says
This looks great! I've always made my own pizza crust but it doesn't turn out like traditional pizza crust as much as just some kind of thin pastry sheet. Hopefully I can do this recipe!
I have a question. I prefer making mini-pizzas because it's just my husband and I. I hesitate to halve recipes because it seems like they don't come out the same. Can I freeze some of the dough? Or can I bake the crusts and then freeze them?
100 Days of Real Food says
I make 4 mini-pizzas from this recipe, and I freeze plain baked dough for my daughter's school lunches...it works great! https://www.100daysofrealfood.com/2011/01/06/real-food-school-lunches-ii/
Elizabeth says
Thanks, I was just wondering how many come out of this recipe
Assistant to 100 Days (Jill) says
Hi Elizabeth. I find I can usually get 3 mid-size doughs out of it. Jill
beth g says
My husband wants to know when i am makingthis again.
mom2lo says
I loved this recipe!! However, I've found that if I follow your instructions (pulse the water/yeast mixture), all of the liquid seeps out my food processor through the hole in the center of the bowl where the blade sits. I bought a KitchenAid 9-cup food processor for the purpose of making THIS recipe, but the liquid went everywhere and I ended up having to start over, then stir the flour into the water before turning it on. What kind of processor do you have? Have you run into this issue when making your dough? And heaven forbid I try to DOUBLE your recipe... I posted on my blog about the trouble I had. You can read it here: http://bit.ly/9WJumR.
Thanks in advance for your help!
Violet Monkey says
I don't know about Lisa, but I made this dough in my Kitchen Aid stand mixer, with the dough hook attachment. I only have a little mini 3-cup food processor (though a bigger one is on my wishlist!), so I knew that would never work. I've always used my stand mixer for dough, and it worked beautifully.
~
Lisa says
That's a good alternative...I use my kitchen aid mixer for other dough making too.
Lisa says
That happened to me too (which I noted in the first paragraph before the recipe). I guess I will change the recipe so no one else has the same problem (I originally thought the problem was just me or my machine!)
Violet Monkey says
This crust was fantastic! Thanks for posting the recipe!