

Want to Save this Recipe?
Enter your email below & we'll send it straight to your inbox. Plus you'll get great new recipes from us every week!
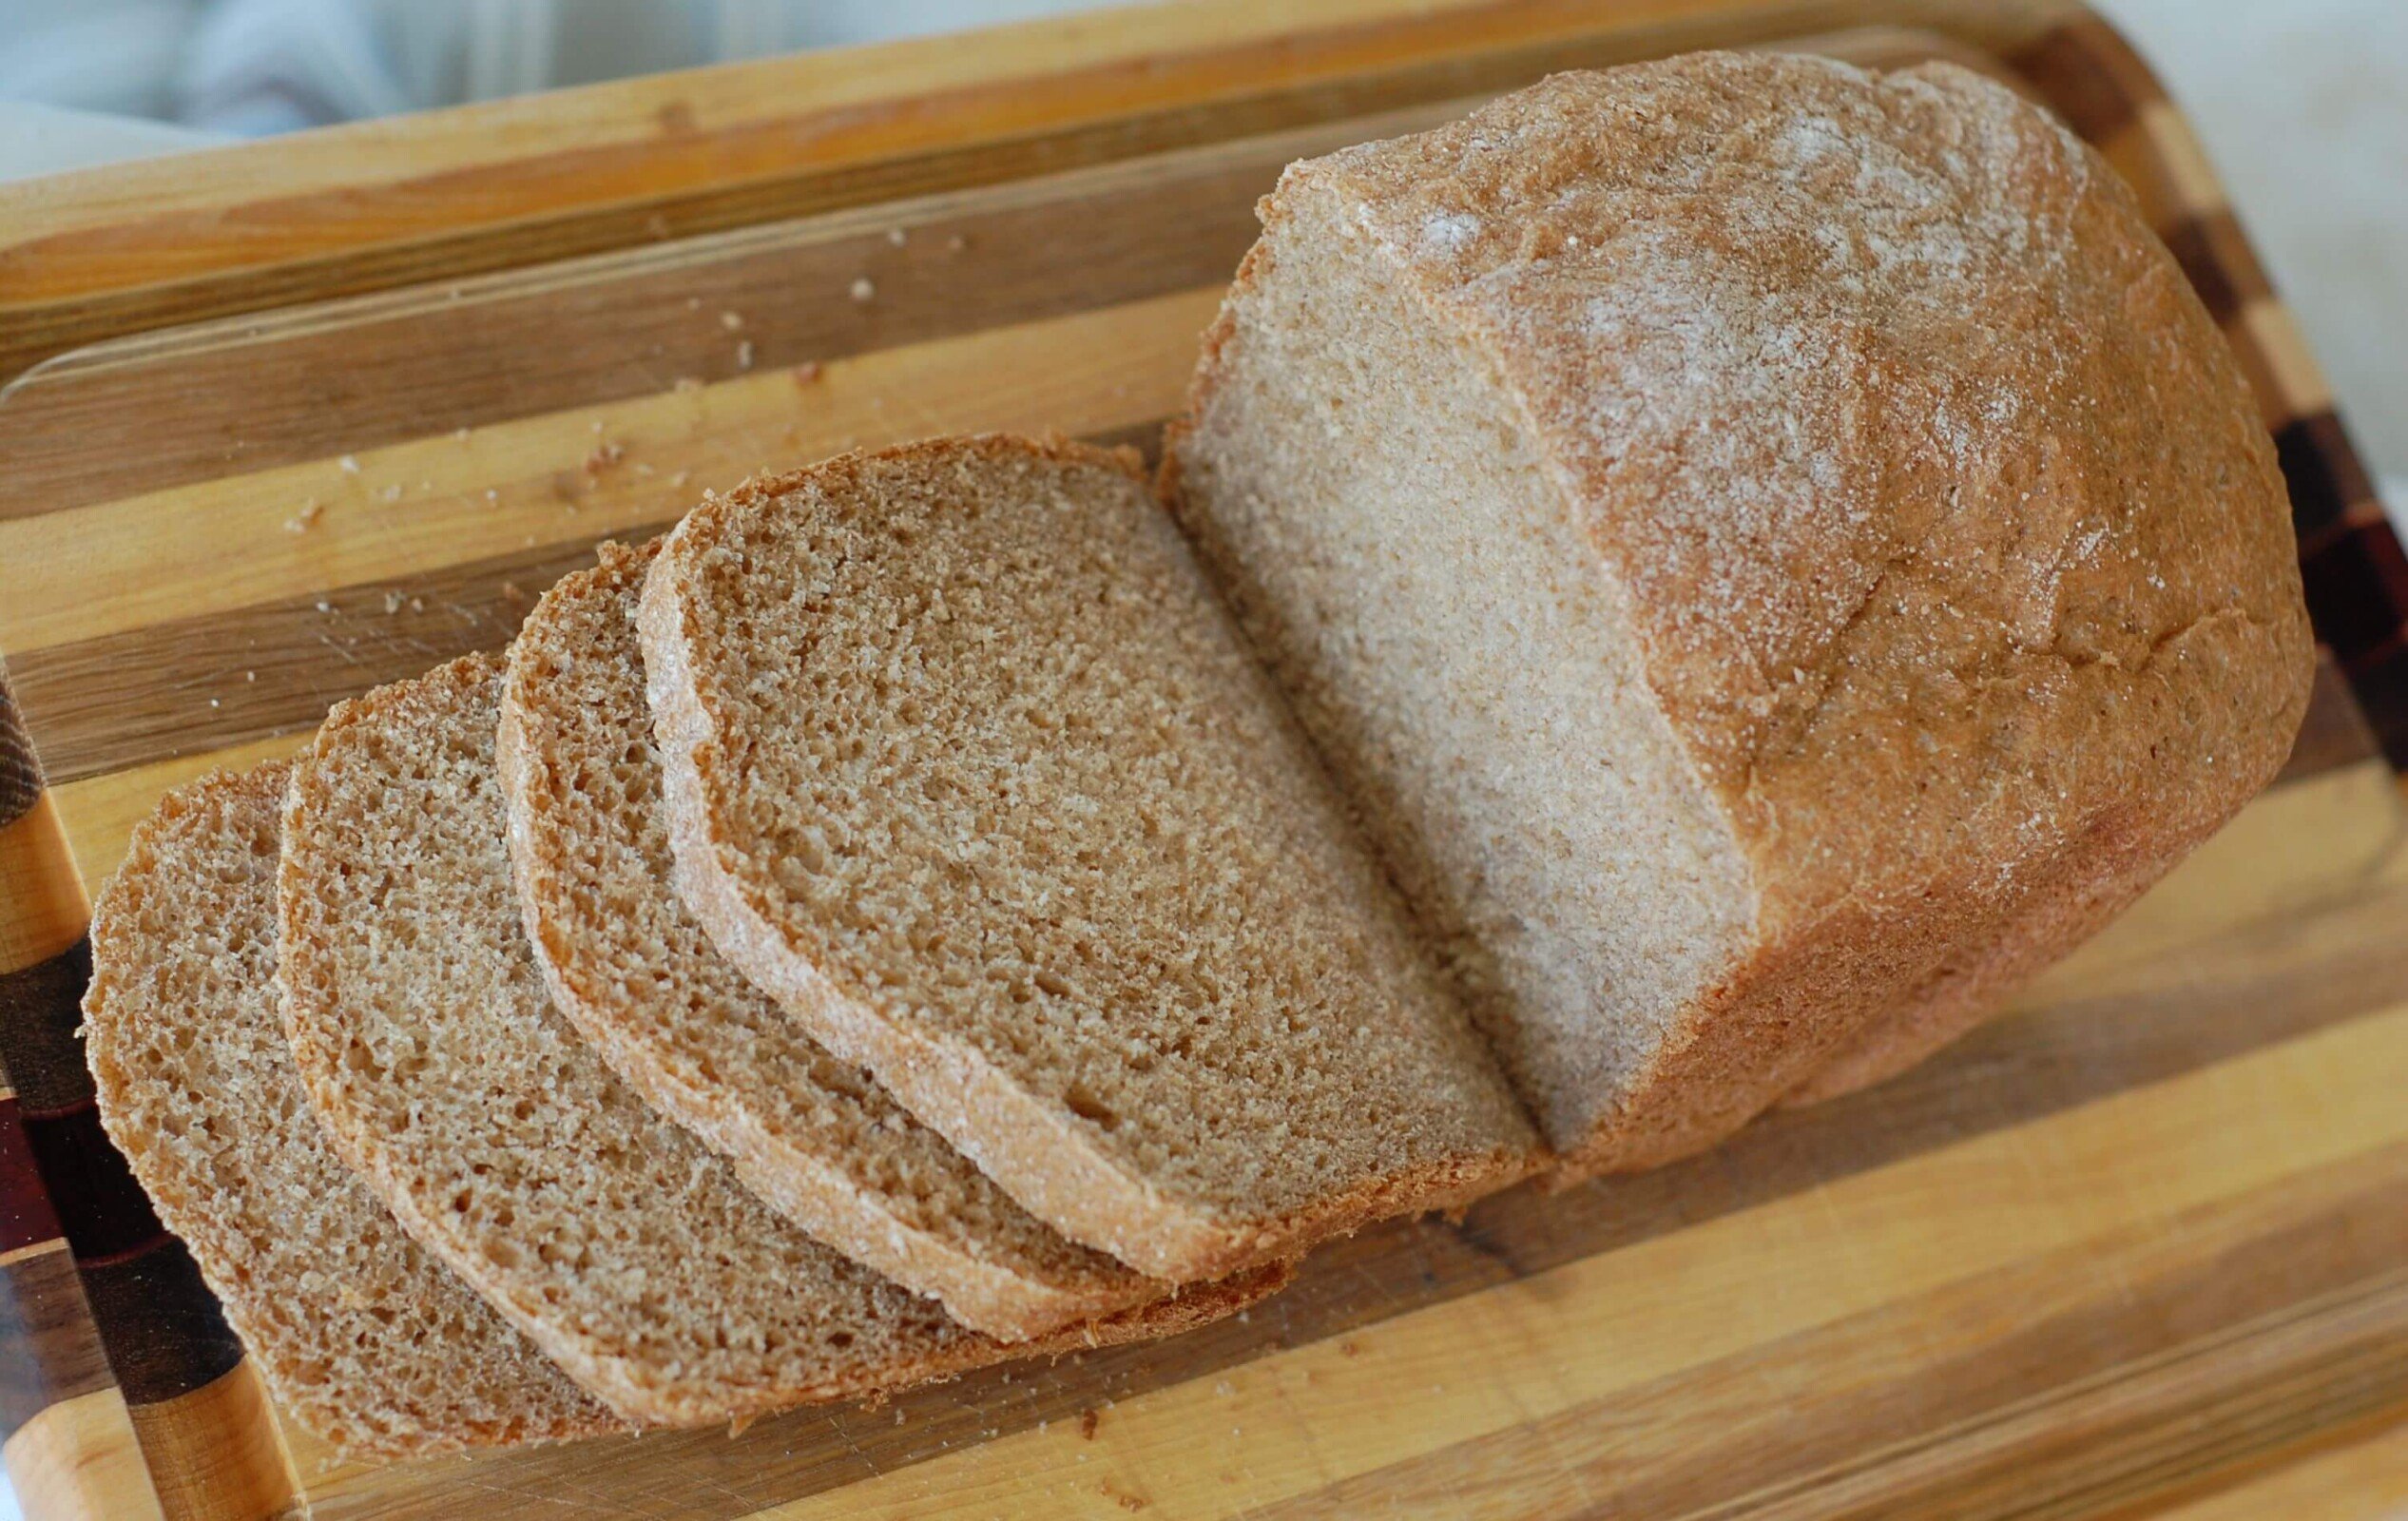
It is no secret that I’ve been working to perfect a honey whole wheat sandwich bread machine recipe for months now. I was not only looking for a recipe that was reliable and tasted good of course, but that also didn’t contain any “unusual” ingredients like dried milk powder or wheat gluten. For a gluten-free option, try this Paleo Bread!
We absolutely LOVE the honey whole-wheat loaf from Great Harvest, and if they can make it with only five simple ingredients (freshly ground whole-wheat flour, water, honey, salt & yeast) then I should be able to do it too!
Featured Comment
Wow! Your recipe has it all! First, of course, it’s delicious. Density is perfect, and my favorite part is that it is so low in salt.
Perfect Whole Wheat Bread Machine Recipe
So after months of experimenting, I am thrilled to finally have a homemade bread recipe to share. And while this recipe comes out just right 9 times out of 10, I’ve learned that things can’t always be “perfect” when it comes to baking bread machine recipes.
If you aren’t weighing your ingredients and instead just measuring them out like me, or if you live in a place where the humidity might change from time to time … well then, expect some occasional surprises with the outcome of your bread.
I have learned one valuable trick though (from a blog reader!), and that is to check on the bread once or twice during the kneading process to make sure the dough looks “right.” I’ve caught mine looking too wet and sticky a couple of times, so I’ve added a few sprinkles of flour to get things back on track before the baking started. Using whole wheat flour is crucial here! Not only does it make your bread recipe more nutritious, but it's also more filling and flavorful.
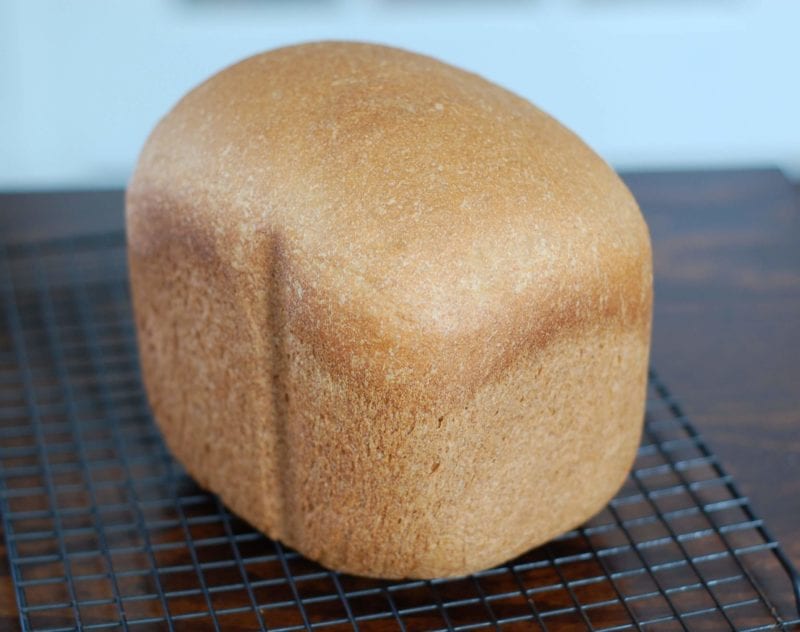
I also want to share that this particular recipe makes a loaf that is on the larger side, which I like because then I don’t have to replenish our bread supply every two days. This loaf also comes out with a lighter crust due to its big size, and that is a plus in my book as well.
Serve bread warm with homemade soup or use it to make delicious whole grain sandwiches!
Easy Trick for Perfect Homemade Whole Wheat Bread Crust
After your honey whole wheat bread has finished baking let it rest for a couple of minutes until it’s cool to the touch. Then remove the bread from the pan and wrap it completely with a clean cotton or linen tea towel. Place the wrapped bread on a rack to cool.
The towel helps stop the bread’s moisture from being drawn out in the open air while still being breathable enough to keep the crust from turning mushy.
Once bread is completely cool you can put it in a plastic bag to keep the crust soft for longer.
Can I Make This Honey Whole Wheat Sandwich Bread in the Oven Instead of a Bread Machine?
Yes, this recipe for honey whole wheat bread also works in the oven. Keep in mind that this recipe is for a 2lb loaf so you'll need a large pan (or split it between two smaller bread pans).
The first option is to use your bread maker to mix and proof the dough, then remove it to bake in the oven. If you don’t have a bread maker, though, you’ll need to make several adjustments to make this whole wheat sandwich bread with honey by hand:
- Add the hot water, a packet (2 ¼ teaspoons) of regular active dry yeast, and 1 teaspoon of honey to a large bowl or electric mixer. Stir gently to combine.
- Tip: Put a little oil in your measuring spoon before the honey and it won't stick.
- Let the mixture rest until the yeast activates (10-15 minutes). You’ll know it’s ready when plenty of bubbles have formed.
- Mix in the remaining honey, oil, and salt.
- Add the flour 1 cup at a time, fully incorporating each before you add the next one. Dough should be soft and not too sticky.
- If you’re not weighing flour the amount each person scoops can vary. Add more or less flour, as needed.
- Either with a dough hook or by hand, knead the dough for 7-12 minutes, or until elastic. You can tell if dough is kneaded enough by poking it; if the dough bounces back quickly kneading is done.
- Cover the dough with a clean towel to lock in heat and prevent drying. Let it rise until doubled in size (1-3 hours).
- Punch the dough down, then shape your bread loaf. Place dough in a greased pan, then cover again to rise until doubled.
- Bake honey whole wheat bread at 375 F for about 30 minutes or until crust has browned.
- Note: Cooking times will vary depending on loaf size and oven, adjust as needed.
Why Didn’t my Yeast Activate in Homemade Bread?
Old or inactive yeast: Yeast is alive and will become inactive under certain conditions. Honey or any type of sugar helps to activate it. Before you bake, make sure the yeast hasn’t expired. Once opened, a container of yeast only keeps for about four months when stored in cool environment, like the fridge. High temperatures can make yeast inactive quicker.
Water temperature: The water should be between 105 and 115 degrees F, a lukewarm temperature that you can comfortably wash your hands in. Too cool and the yeast won’t activate, too hot and it kills the yeast.
Not added to the bread machine correctly: Most bread machines have very specific instructions for how to add the yeast. The general rule is to keep the yeast dry; if your bread machine doesn’t have a yeast compartment, see if it helps to dig a small well in the flour to keep yeast from activating too soon in the cycle. If you prefer a version without a brand machine, make this Whole Wheat Bread!
Didn’t wait long enough: If you’re making this recipe by hand make sure you wait until the yeast has fully activated before adding other ingredients.
If you enjoyed this honey whole wheat sandwich bread or have any good bread-making tips or recipes that you’d like to share, please do so in the comments below!

Honey Whole-Wheat Sandwich Bread (for bread machine)
Ingredients
- 4 ¼ cups whole-wheat flour
- ½ teaspoon salt
- 1 ½ cups water (warm (not too hot or it will kill the yeast))
- ¼ cup honey
- 2 tablespoons olive oil (or melted butter)
- 2 ¼ teaspoons active dry yeast (1 packet, or bread machine yeast)
Instructions
- Layer the dry ingredients into the bread pan, according to manufacturer's instructions (check the user manual for this).
- Make a well and place the wet ingredients on top of the dry ingredients. My particular bread machine (this one is similar) has a separate area for yeast; please consult your bread machine's instruction manual for yeast placement as this is very important!
- Select the whole wheat option on your bread machine and press start. My machine takes 5 hours to make a whole wheat sandwich loaf.
Notes
- Be sure to check your bread machine's instructions for how ingredients should be layered. This recipe goes by my machine's (the Oster ExpressBake Bread Maker is similar) preference which is dry ingredients first, then wet ingredients on top.
- This recipe has been around for a while, and I've read many comments about adapting it to bake in the oven. If you still want to use your bread machine, though, you can select the dough cycle to get the dough just right, then transfer to a bread pan and bake the bread in the oven.




Laura says
What did I do wrong? Made this last night and it is sooo dense. The kids are not fans. I am gluten free so I can't taste it, but it is definitely really heavy. Would love any suggestions on changing it!
Assistant to 100 Days (Jill) says
Hi Laura. I'm not sure how new you are to "real food" - but this bread will be a lot heavier than what you are used to. Many times I only eat a half of a sandwich with whole wheat bread because it is so much more filling. Jill
Christa says
Do you use King Arthur's white whole wheat flour for this?
Assistant to 100 Days (Jill) says
Yes Christa - you can use King Arthur's white whole wheat flour, although, I think Lisa often grinds her own wheat as well. Jill
Garrett says
I have tried 3 times to make this bread and it never comes out right. It's super dense and the middle isn't right.
Assistant to 100 Days (Jill) says
Hi Neely. Best of luck to you and your husband with your health and pursuit of a family. Stick with it, you'll quickly start to feel the benefits and you'll be a pro in no time at Whole Foods :-)))!! Jill
Charlee says
Is there a different measurement if you use the yeast for a bread maker? I know sometimes its a different measurement
Assistant to 100 Days (Jill) says
Hi Charlee. This recipe is configured for a bread machine so the measurement is accurate. Jill
Squidgy says
I've made this bread for the first time and it smells and tastes lovely but it didn't rise at all !!! HELP
Assistant to 100 Days (Jill) says
Hi Squidgy. Did you follow the recipe exactly and were all of your ingredients fresh? Jill
Thabata says
I'm so excited to start making my own bread. I want to use brown rice flour tho...Can I switch the whole-wheat flour to brown rice flour?
Assistant to 100 Days (Jill) says
Hi Thabata. I have not tried substituting brown rice flour in this recipe, but, you could give it a try. I would just check for substitution ratios (you can usually find them online) to see if it is 1:1. Good luck. Jill
Anna says
Great, thanks for the tips!
Jdavis4938 says
Help! I don't have a bread machine!
Lisa says
If you read through the comments there's some advice/tips on making this without a bread machine.
Anna says
Hi, I absolutely love these recipes! I was wanting to put seeds and some rolled oats in this bread recipe...to make it more healthy...maybe even milled flax seed. Could I just put it in the bread or would the dough turn out wrong? If I wanted to put that stuff in, what changes could I make? I hope that made sense!! :)
Lisa says
So glad you are enjoying the recipes. If you want a bread recipe with oats/seeds you may be better off looking for a recipe that already incorporates these things. I've found bread baking to be challenging at times and especially if you start changing or adding things you never know (although you could experiment).
Erin Crowe says
Is there anything I can substitute for the honey or just leave it out althogether because my daughter is not old enough to ingest honey and I want her to be able to eat it also. Thanks!
Assistant to 100 Days (Jill) says
Hi Erin. You should check with your doctor, but, I think to use the honey in baking may be ok, it's ingesting raw honey that I believe is the problem. Again, you should double check with your doctor. Jill
Melissa says
The botulism spores can only be killed by the high heat which can be obtained in a pressure canner. The toxin (that is produced in anaerobic conditions) can only be destroyed by boiling (OSU Botulism FAQs). So technically, honey is not safe for infants even in cooked form such as in baked foods like breads. Botulism spores will NOT be destroyed during and under household cooking methods and temperatures.
http://wholesomebabyfood.momtastic.com/infantbotulismhoney.htm
Mimi says
Do you use bread flour or regular? My
Loaf was really flat on top although it tasted great! How about the yeast? Rapid rise or regular? Thanks!
Assistant to 100 Days (Jill) says
Hi Mimi. The recipe just uses regular flour and active dry yeast. Jill
Sarah says
For everyone inquiring about converting the recipe - I found a sweet little tool to change the batch size of any recipe, here: http://www.fruitfromwashington.com/Recipes/scale/makeconversion.php
Angie says
Just made this for the first time and it turned out perfectly. Will make it weekly now!
Jessie says
Made this for the second time last night. This time I used butter instead of oil and added another 1/4 cup of water. It came out so great! It took a lot of restraint not to eat the whole thing fresh out the breadmaker!
Hoping this time it doesn't get so hard within the first couple days.
Ashley Grace says
I made this bread and it turned out well. The 2nd time I made it, I 2 cups and 1/4 of ground up oats and 2 cups of whole wheat flour. It turned out a lot lighter and my husband loved the difference in taste. I was thrilled that adding the oats worked so well. We were looking for a high protein high fiber bread recipe that tasted good. :-)
Tasha says
What setting did u use to bake?
Assistant to 100 Days (Jill) says
Hi Tasha. Since every machine is different, you need to follow the instructions for your machine. Jill
Eryn says
My kids are happily eating it as toast right now and are waiting for me to come make more. My question is: how do I make it more moist? I am new to the world of bread machines (got mine new in the box for $10 at a yard sale) having only used tried and true homemade recipes handed down from both my grandmothers. I just like a more moist bread.
100 Days of Real Food says
Glad your kids enjoyed the bread. Surprisingly enough the bread can change quite a bit depending on the weather outside...I've found that rainy/humid days are great for making bread (and yield a better loaf). You could also try playing with the water and honey ratios a little, but anytime you change a recipe it becomes an experiment.
Jen says
oops, I meant flour. :)
What would be an adequate conversion of ingredients to 3.5 cups of flour? That is all my bread maker will hold.
Jen
Jen says
Hi there!
I have made this bread a couple of times with some success. The problem I am having is converting the amount of ingredients to how much flower my bread maker allows (3 1/2 cups).
Any suggestions?
Jen
Gina says
do you have a recipe for the oven? can i use the same technique and then put it in the oven?
100 Days of Real Food says
Here's a good recipe that uses the oven: http://deliciouslyorganic.net/everyday-whole-wheat-bread/
Jennie says
This recipe worked very well for us. I used coconut oil in place of the oil/butter. The color of the sliced bread is gorgeous and it is in a good place between dense and fragile. Makes a good-sized loaf, too--I set my machine for "medium" and will set it for "large" next time. Great to have a 100% whole-wheat recipe in my arsenal. The one I usually make is 1/2 WW, 1/2 white flour.
Jaci says
I'm wondering if anyone knows how to make this recipe in a crock pot? I've been seeing lots of posts on pinterest about making bread in a crock pot/slow cooker instead of a bread machine. And since that's what I have I thought I would try it out with a nice basic bread recipe. Most of the ones I've found specifically for crock pots are "special breads" nut breads, fruti breads, herb breads. Just wondering if anything about the process would change just b/c its not going into a bread machine or oven?
cara says
Lisa, have you ever tried using ghee for the oil when using your bread machine? We have the same machine. Thanks!
100 Days of Real Food says
I cook with ghee, but have not tried it in bread. If I were going to go that route I would probably just use regular butter though...good luck!
Lisa says
What size loaf does this recipe make?
100 Days of Real Food says
It's about 2 pounds.
Tasha says
I usually buy the honey whole wheat from Great Harvest Bread Company, but found this a couple weeks ago.I tried this recipe in my oven and it was really dense, so I got my hands on a bread machine and it turned out the same way...really crumbly,dense and a little dry...any suggestions?!?!?!
100 Days of Real Food says
Did you follow the recipe exactly? Did you check it during the kneading process?
tasha says
I did follow it exactly, not sure what i would be looking for in the kneading process
100 Days of Real Food says
The dough shouldn't be too sticky or dry. It shouldn't be sticking to the sides, but instead in a nice ball. I hope that helps!
Tiffany says
I'm glad to see people have made this in their oven. I found a recipe on the back of my bag of wheat flour and made it last night. I was so excited it turned out tasty! Now I will have to try this one, I just couldn't convince myself to buy a bread machine and I don't have a fancy mixer so I was bummed but now I have been inspired to try my luck with it in the oven.
rhyann says
Made this today with my stand up mixer and then put into the oven.
I love how dense it is and how easy it was to slice.
My 5yo told me it tastes like it is organic. Oh well, I'll just keep on reworking her little taste buds.
Monica says
SO.DELICIOUS! Added 1/4c rolled oats to batter and sprinkled some on top. I did the double rise method, once after everything was mixed and again after I kneaded it and put into loaf pans. The recipe as is yields 2 loaves. Side note: in an oven at 350 degrees, both loaves baked in about 30 minutes :)
Hillery says
Do you know if it would be ok to sub whole milk or half & half for the water in this recipe? I'd like to try it but our LO has weight gain concerns and so I have to bump the calories/fat on his favorite foods (bread).
100 Days of Real Food says
Bread recipes are very finicky so I am not sure if that would work or not.
Stacy says
Just wanted to let you know I used this recipe to make hamburger buns tonight. I chose the dough/pasta setting on the bread maker, took the dough out, kneaded it a few times with some flour and separated into 8 balls of dough. I placed them on a cookie sheet to rise for about an hour and then baked at 375 for 15 minutes. I also brushed the tops of them with butter before and after baking to make sure they did not get hard. They turned out great!!! Love your site!
Robin says
Hi, I just recently got a Zojurushi bread maker second-hand, and like most second hand things it did not come with the manual. I tried the recipe for a white bread for my model(from the internet) with great success, I only substituted honey for white sugar and olive oil for butter (because I didn't have unsalted butter) and I used bread flour. However the problem is, I would like to try your recipe for whole wheat in it and my model makes a 1.5 pound loaf and not a 2 pound loaf. Would you happen to know the adjustments for the amounts of ingredients for a smaller loaf. The whole wheat loaf I looked up on the Zojirushi website for a similar model is not the same as your recipe. I am willing to use half (or part) bread flour and half whole wheat if necessary to ease into it for my boyfriend and I, but I don't want the machine to overflow and I definately want to get a good rise. It also does not have a crust adjustment button on this model, but when I made the white bread the crust was divine. I have the King Arthur's white whole wheat at home and only used the 5 ingredients to make the bread (no dough enhancers, dry milk, or eggs). I used active dry yeast measured with a spoon from the jar. I measured by leveled cups and not weight. Do I just substitute the white whole wheat flour for the white bread flour and keep everything else the same? Or is there some other adjustment I need to make when using whole wheat flour? Sometimes the more you read, the more confusing it gets. I really can't afford to be wasting ingredients, it needs to turn out at least "edible". Thanks to anyone who has any suggestions.
100 Days of Real Food says
It sounds like you'll have to experiment, but since you've had success with the white bread loaf I would suggest jut trying that same recipe with white whole wheat flour (like you mentioned) as a starting point and go from there. Good luck!
Robin says
Thanks, I think that is what I will do. I'll try to let every one know the results.
tracy says
Ok I have a bread machine cause I wanted to start making my own vs buy from store which has a million ingredients, so I have been playing with a couple but everytime I make the next day the bread is hard as a rock, WHY? I made this one last night and it was yummy super soft but this morning i woke up hard as a rock...How do you store and keep it soft at the same time...Thank You
Kelli U says
Tracy, how are you storing it? I let mine cool and put it in a gallon size zip lock bag, sucking out all the air and it's just fine. It also stays in the fridge after a day b/c it will go bad quickly. Then I heat it a few secs in the microwave.
100 Days of Real Food says
How are you storing it overnight? I put mine in a plastic bread bag and seal it with a clip.
Jan says
I made your honey wholewheat recipe today and it was great, my family LOVED it. I made mine in the oven. After my yeast became foamy I added the butter and honey to it and then added it with the wheat (I put the salt in with the wheat). At this point, mix, knead and place in a oiled bowl covered with oiled plastic wrap. I let the dough rise for an hour, then kneaded it again. Then, I placed it in my oiled bread pan and covered it with oiled plastic wrap. Let it rise for an hour. Remove plastic wrap and bake a 400 degrees for 25-30 mins.
*I followed the recipe measurments exactly
Thanks for the great recipe!
Amanda D says
Hi! I wanted to let anyone know that if they're having trouble with it rising, baking properly, or not hardening that I did some experimenting with this recipe over the last few days and I finally got it to work! I use 100% whole wheat flour from Trader Joes and since it's more dense, it was preventing it to really rise, and the crust would come out looking crumbly and burnt. If you notice, your bread never gets into a doughy consistency when this will/does happen. Therefore, you want to add more water/oil during the mixing time (mine is the first 10 minutes, then more later.) I do it during the 1st 10 min, so I don't have to worry later.
I added another tablespoon of olive oil during the mixing process, then SLOWLY added more water, one tablespoon at a time until it became dough rather than the little dry balls it was before. Also, feel free to use a spatula to mix the dough along with the machine, so that you can see when it really is a dough-like consistency.
Ultimately, it depends on the machine you're using (I had a 20+ yr. old machine that NEVER had this problem before it died) but also your altitude. I'm in NM so I know that things take longer to rise and bake here. Experiment!! And thanks Lisa for the recipe!
Esther says
What is your altitude? I'd love to get this to work... I am assuming my fallen loaf is due to altitude.
100 Days of Real Food says
Altitude sounds like it is the issue...I really don't have any experience with baking at high altitudes so I am not sure what to tell you. Sorry!
Anna says
Hi, I have made this bread and first of all, my whole family LOVES it and will continue to make to for our bread! I do have a problem with it rising, though. I've made it 4 times and each time it has been flat (still good)! I've been reading through the comments and it looks like altitude might be my problem since all of my ingredients are fresh. I live in Anchorage, Ak. Anyone else happen to live around here and can give me some tips on to help make it rise? Thanks in advance!
Megan says
My first 3 attempts ended in flat (or concave) bread with the outside hard that was dry & crumbly. I heard that moisture in the air can affect the outcome but one day was sunny, one cloudy & the other rainy. (Btw, my machine is a Oster "2 lb Expressbake breadmaker", it doesn't have a loaf size selection, but the whole wheat setting is 3hr 40 min long with 3 rises.) I then read that adding wheat gluten can help with rising issues so I added it. Cha-Ching! Nice high loaf that is even soft on the outside! It also is a LOT less crumbly. I don't know how I feel about adding the wheat gluten though. I'm in Mesa, AZ (altitude is only about 1200 here). Hope this helps. Oh, I also spooned the flour into my measuring cup instead of scooping it on the gluten test run.
Jessie says
We made this bread (and LOVE it). But today it's rock hard. Have you had this problem? I saw you found some "bread bags" but I couldn't find any at the store. This morning I dunked it in eggs and grilled it up on the stove, but for my next loaf I would like to keep it softer to eat with sandwiches.
Thanks!
100 Days of Real Food says
How about just one of those big 2 1/2 gallon zip lock bags (from Target)? I found bread bags at a grocery store called Harris Teeter...only place I can find them.
Amanda D says
Ive found bread bags at Albertson's as well.
Jessie says
Made this last night and it's great! Very simular to our Honey Whole Wheat from Great Harvest. My daughter loves watching the dough throught the window of our machine! Thanks for this!
Stephanie says
What size loaf is this? My bread machine requires me to put 1.5 or 2 pound loaf??
100 Days of Real Food says
This makes a 2 lb loaf
Jessie says
I just made this bread today - and I love the taste! BUT, mine sank in the middle. It was looking great, and then with about 30 minutes left to to, it started to sink in the middle. Has anyone had this happen? Any way to prevent it?
Veronica B. says
Hi Lisa! We bought a bread machine just to make this bread and we are so happy we did because we all love it. The only thing is that my 6 month old will be starting to eat more solids in the upcoming months and my pediatrician advised against honey for an infant even when baked because of botulism. I know that many of your recipes can use maple syrup instead of honey, but that just seems weird for bread. Do you know of something else I could use? I was thinking agave but then I noticed that you don't list agave as a nonprocessed food. Any tips would be greatly appreciated it!
Veronica B. says
What about coconut nectar?
100 Days of Real Food says
It's not something I've researched, but if you are just talking about straight from the coconut then that's fine.
100 Days of Real Food says
Good question! I guess you could try a little organic sugar instead. The bottom line is that "sugar is sugar" and no matter which one you choose it should always be consumed in moderation.
Leslee Wessel says
I love the simpliciy of this recipe and the few ingredients. However, we live at 7200 feet elevation. Does anyone have experience of what to change for the high altitude. We also love Great Harvest breat but can't find it in our neck of the woods. Thank you so much for being willing to share.
Mike says
What is the best way to store fresh made bread like this? I've just been wrapping ours in cling wrap but wanted to know if there was a better way. Thanks so much!!
100 Days of Real Food says
I just put it in a "bread bag" which is like a plastic ziplock w/o the "zipper"...found a box of them at the grocery store.